
The Sonos Play:1 only has an AC input, and internally the main supply is 24 volts DC. Standard 802.3af/at PoE is roughly 48 volts and requires the device to include negotiation logic, so adapting it would require some extra hardware. However, I realized something that makes this project way easier: many "enterprise" WiFi systems use a nonstandard scheme called "Passive PoE" where 24 volts is applied directly to the Ethernet cable with no negotiation steps. Even better, the Sonos Play:1 is a 100 Mbit Ethernet device, not gigabit. 100M Ethernet uses only two of the four pairs in a cat5 cable (gigabit uses all four), and the other two are spare. 802.3af/at standard PoE requires that the device be able to accept power on any set of pairs, but "passive PoE" usually only uses the spare pairs.
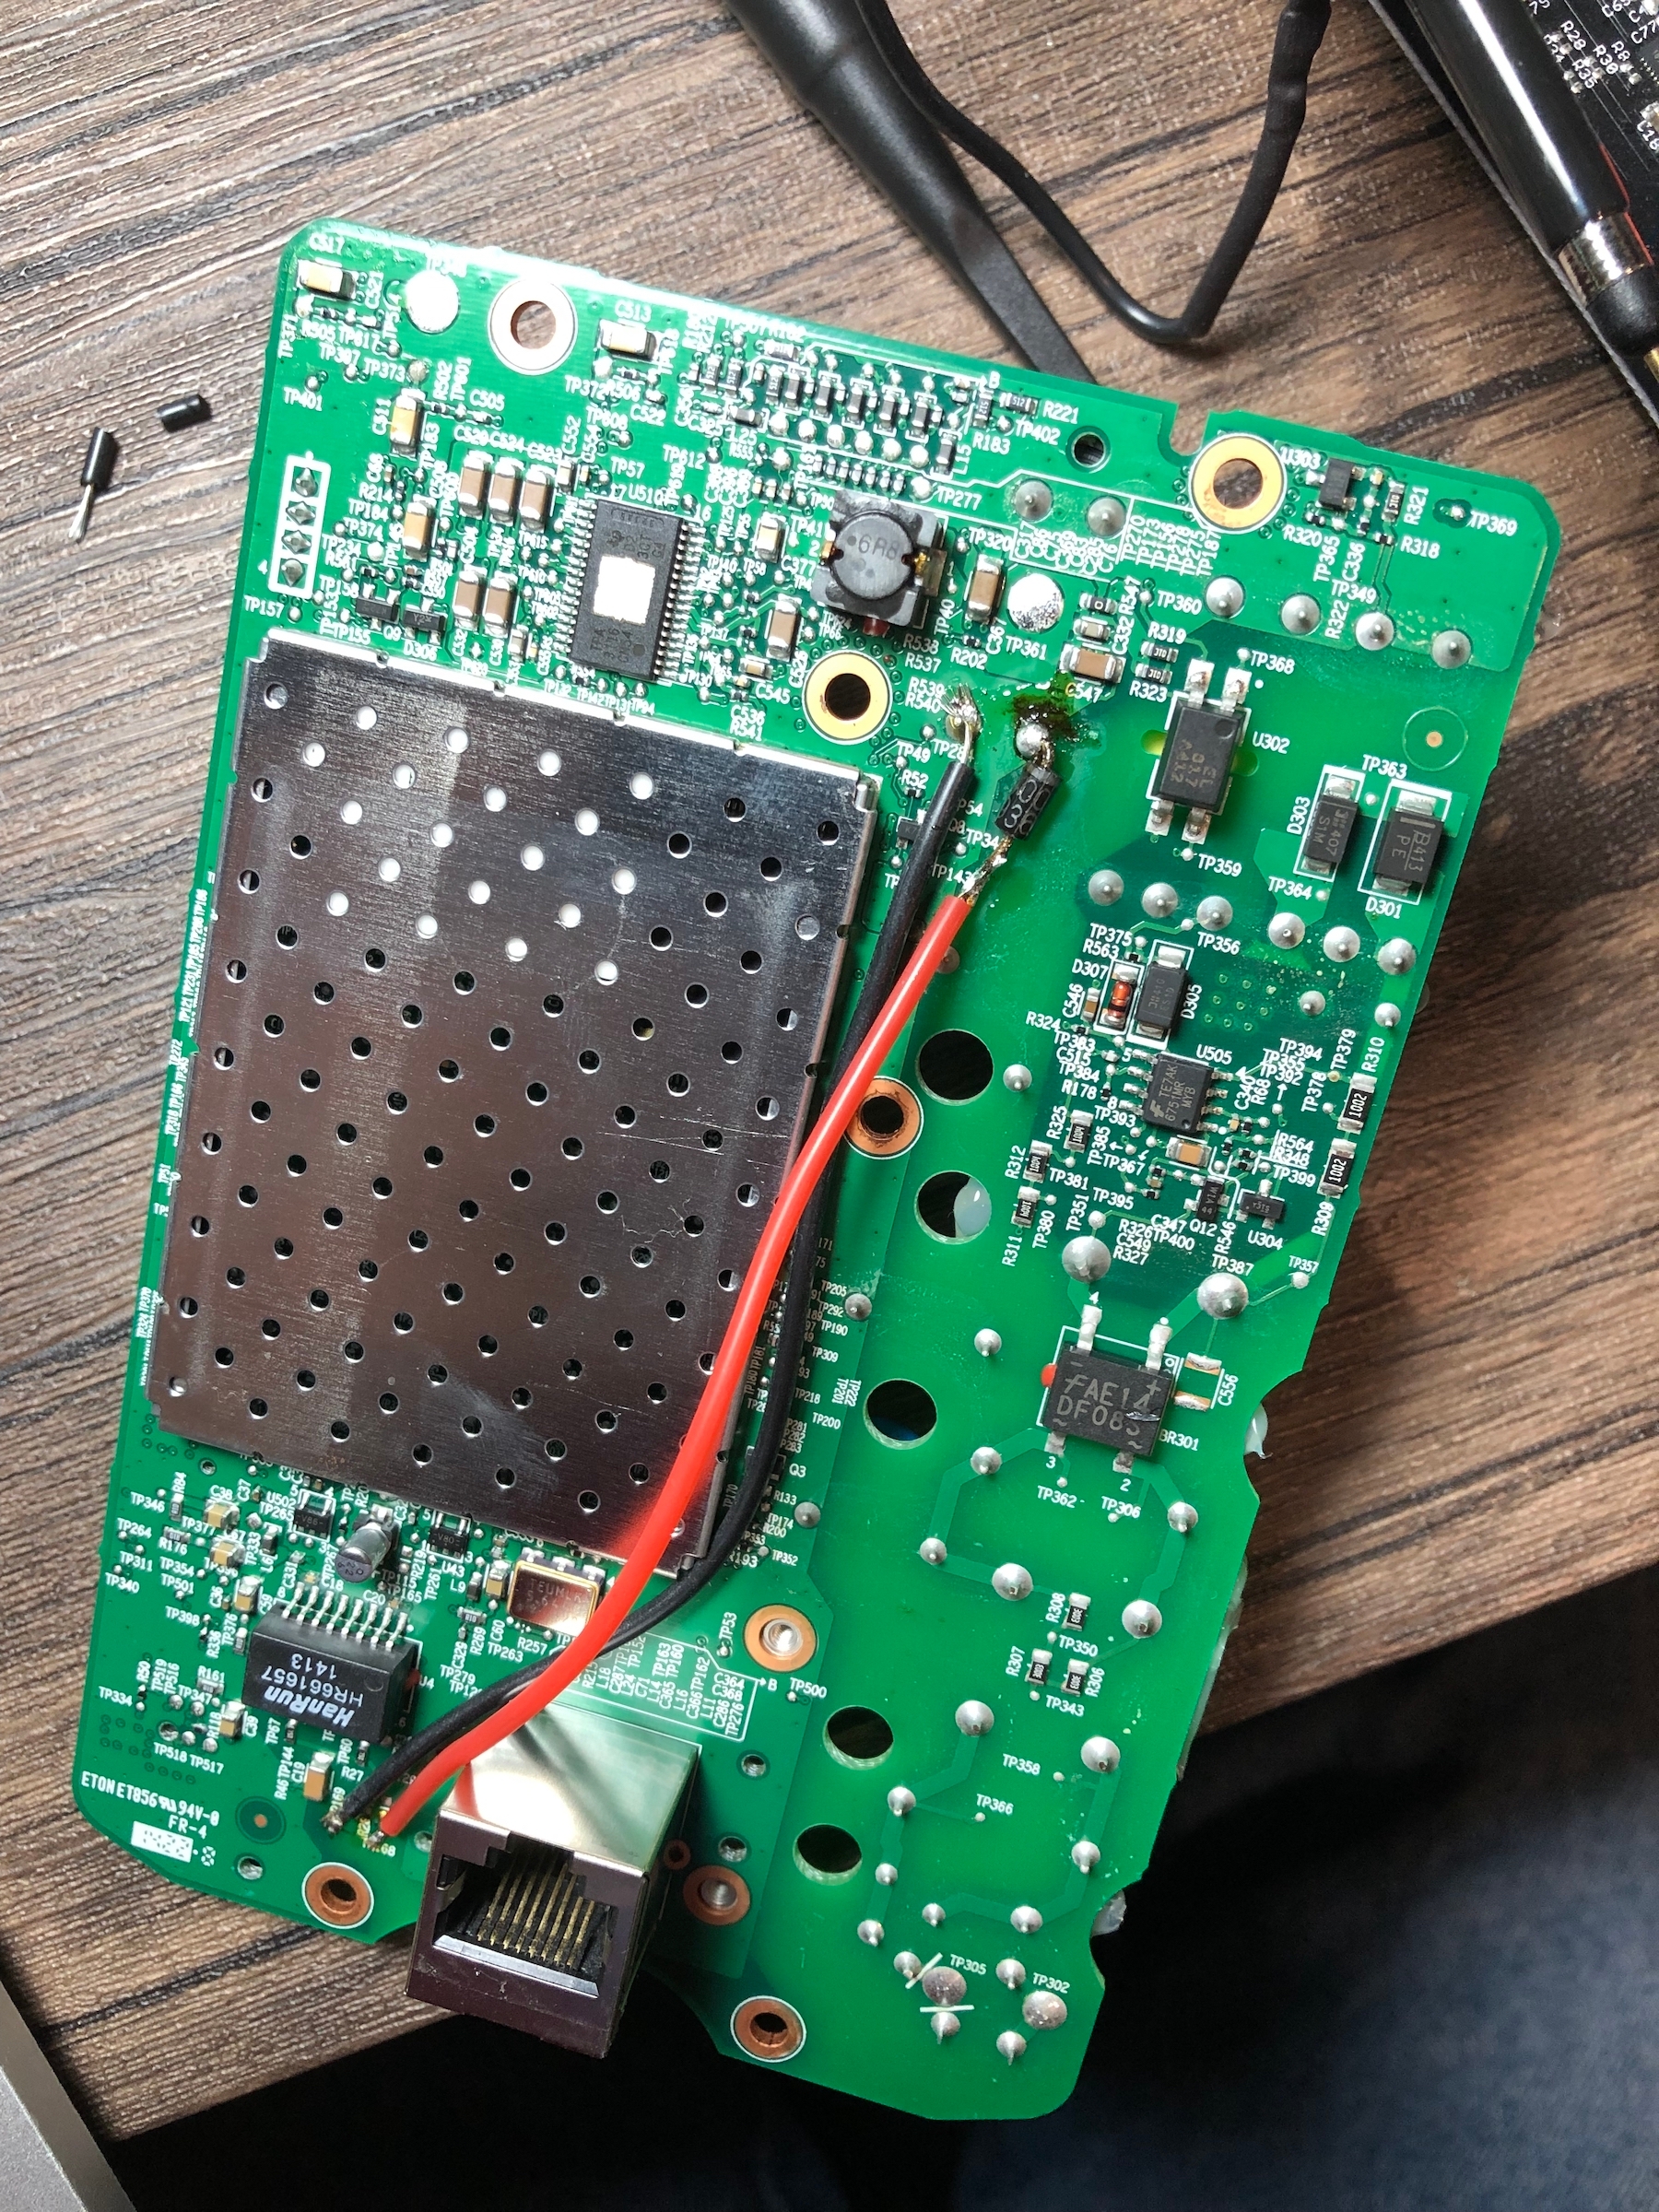
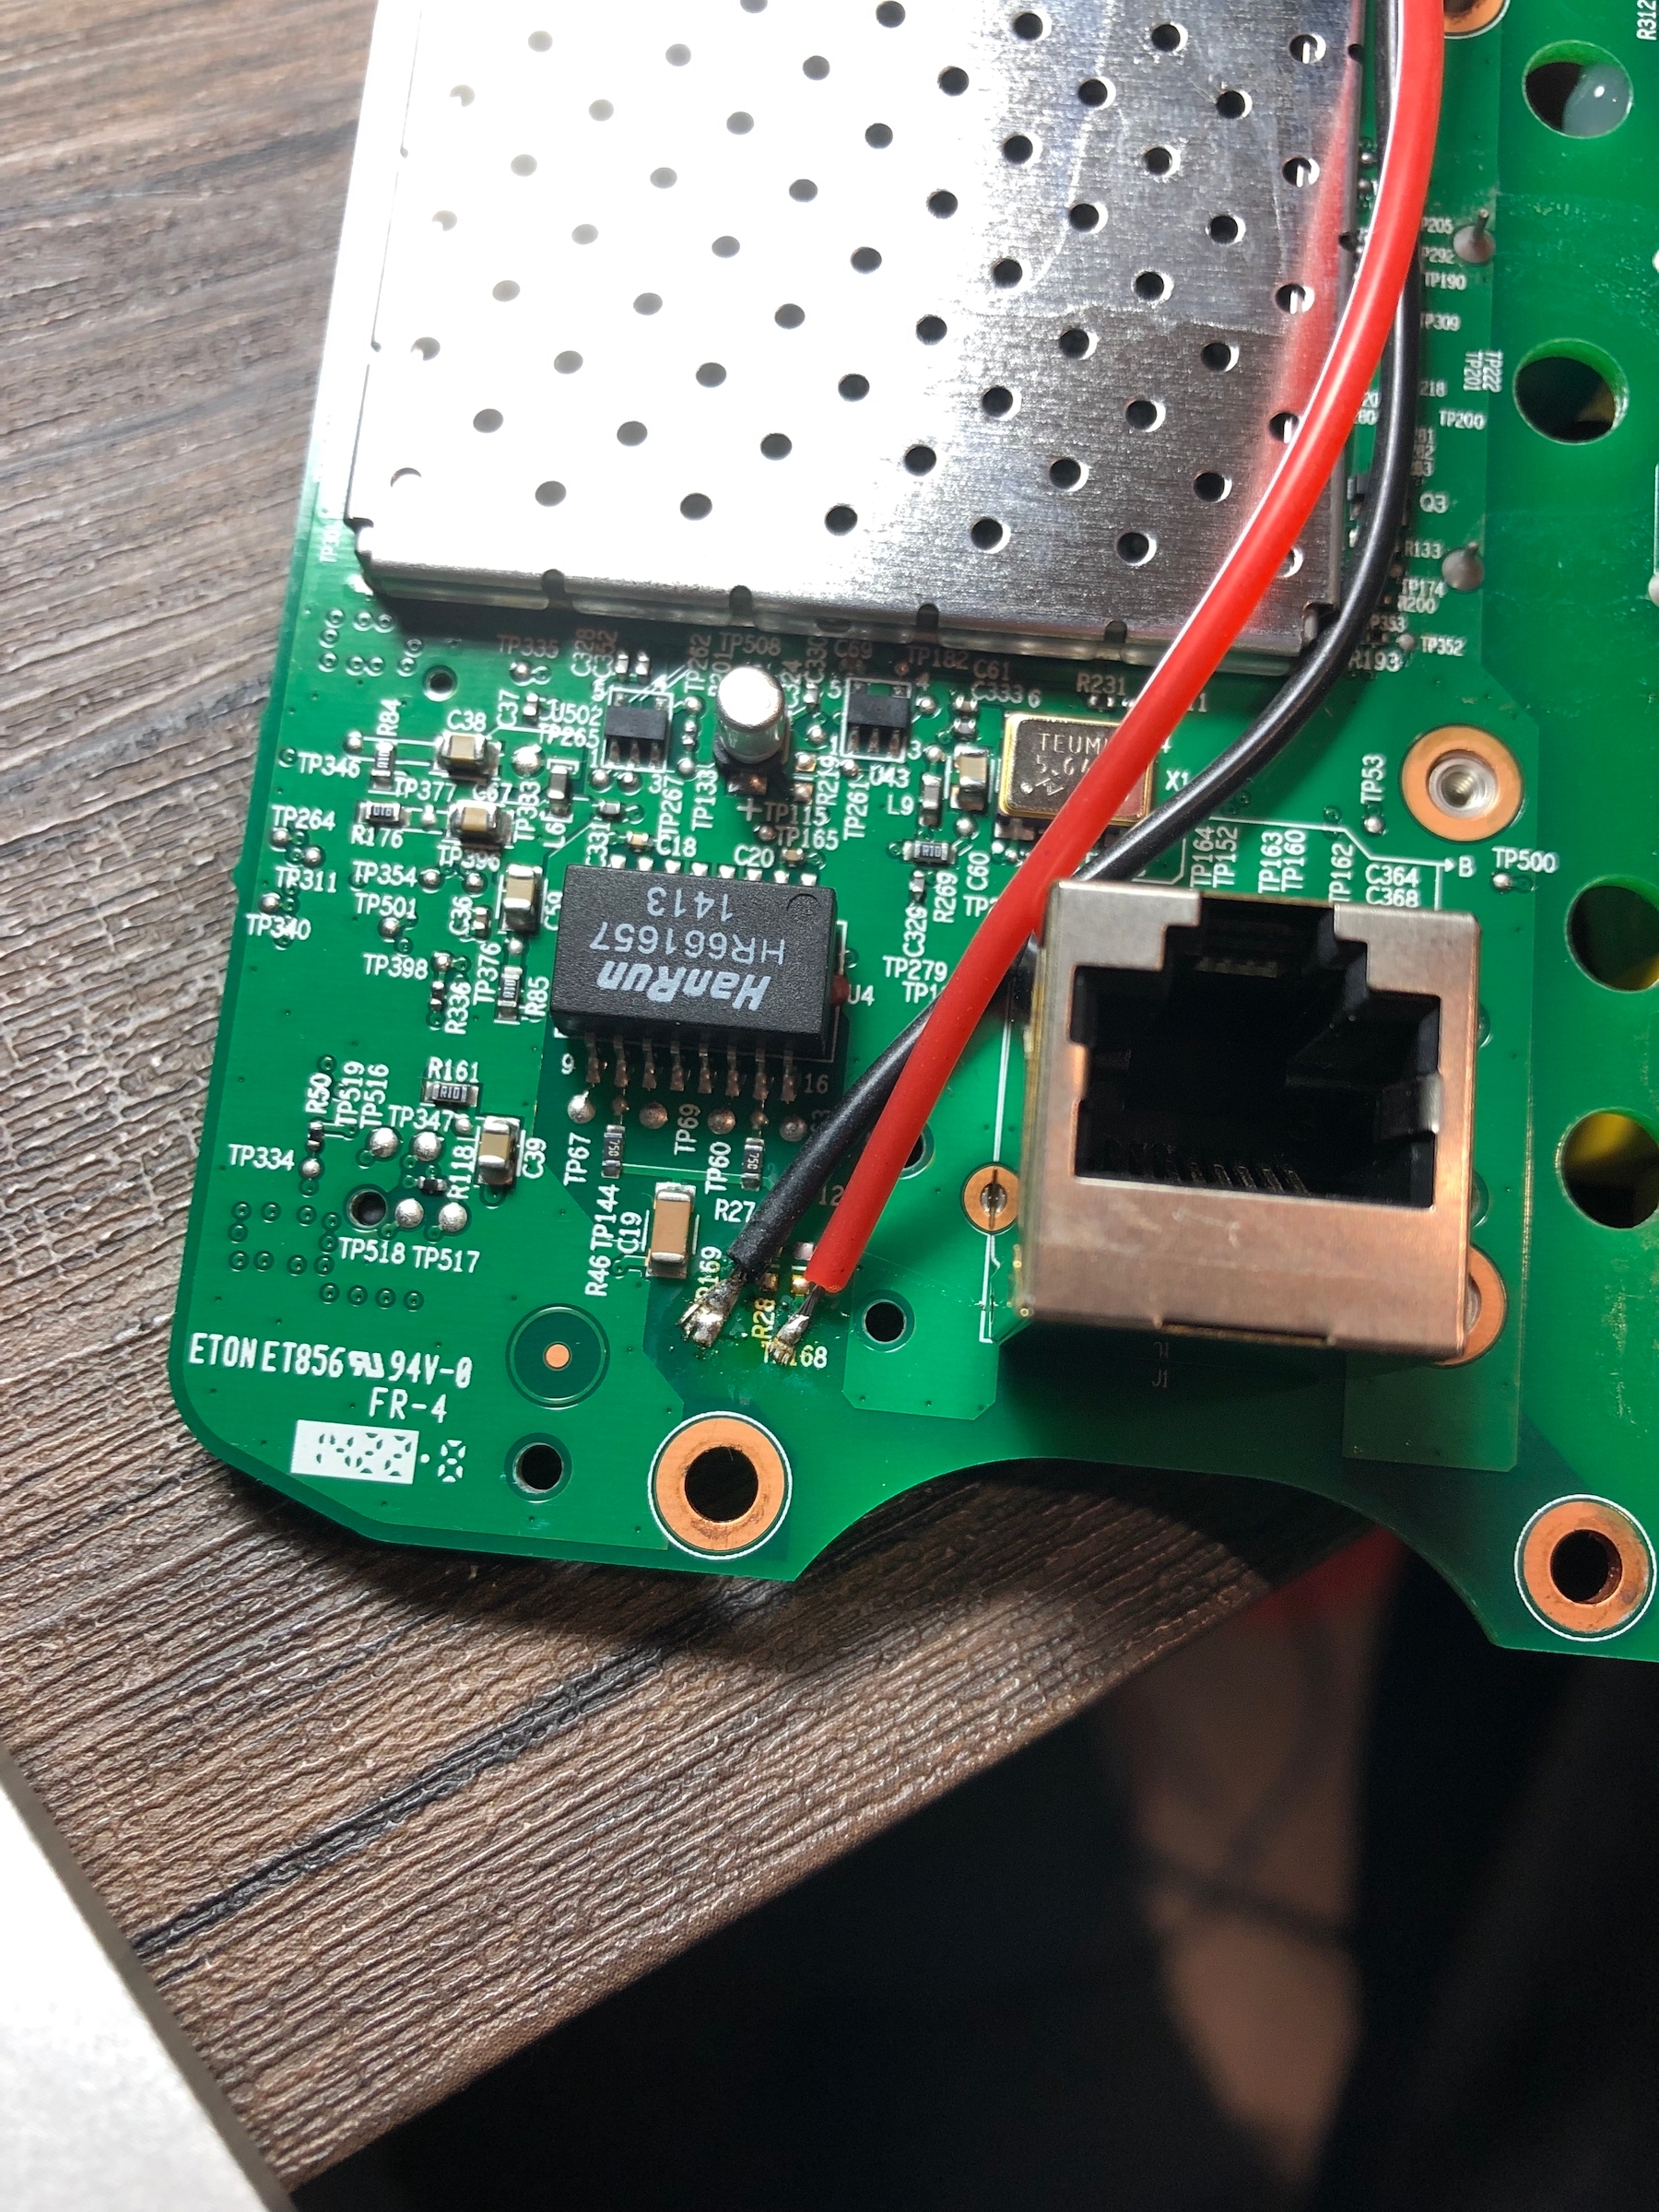
So I opened up my Play:1. I don't recommend this - there's a lot of adhesive acoustic foam that's hard to put back correctly (plus that pesky warranty). At least there are guides for how to do it on iFixit. After exposing the motherboard, I was glad to discover that Sonos had routed the spare Ethernet pairs in an accessible place on the top side and even placed test points that were easy to solder to. I did have to remove two drain resistors that shorted the spare pairs to a common bus on the external side of the Ethernet transformer - they were easy to spot. Then I just added two jumper wires between the Ethernet port and main power supply caps, and one diode to prevent back-feeding power out the Ethernet port if the internal supply is powered. Shazam:
My network switch is capable of supplying 24v passive its own, but I'd rather use 48v through the walls to minimize voltage drop and power loss. I found an adapter on Amazon called "GAT-24v25w" that converts 802.3at to 24v at 1 amp. Initially it did not work; the LEDs on it went dim as soon as I plugged in the modified Play:1 and the Play:1 did not boot. After some debugging I found that the adapter couldn't handle the large amount of bulk capacitance on the Play:1's supply rail. I was able to fix things up by reworking the GAT-24v25w with a much larger 10uF capacitor on its internal DC/DC converter's slow start pin - unfortunately, I didn't get a picture of this while I had it open, but I can if people are interested. After that modification, it ran perfectly!
I did also try connecting the modified Play:1 directly to my switch with Passive PoE enabled (Ubiquiti US-8-150W). While it starts and runs fine, I didn't test at high volume, and at moderate volume the current can exceed the switch's rated 700mA limit. Plus there's a risk of accidentally blowing things up if a non-PoE Ethernet device is attached, which won't happen in 802.3at mode.
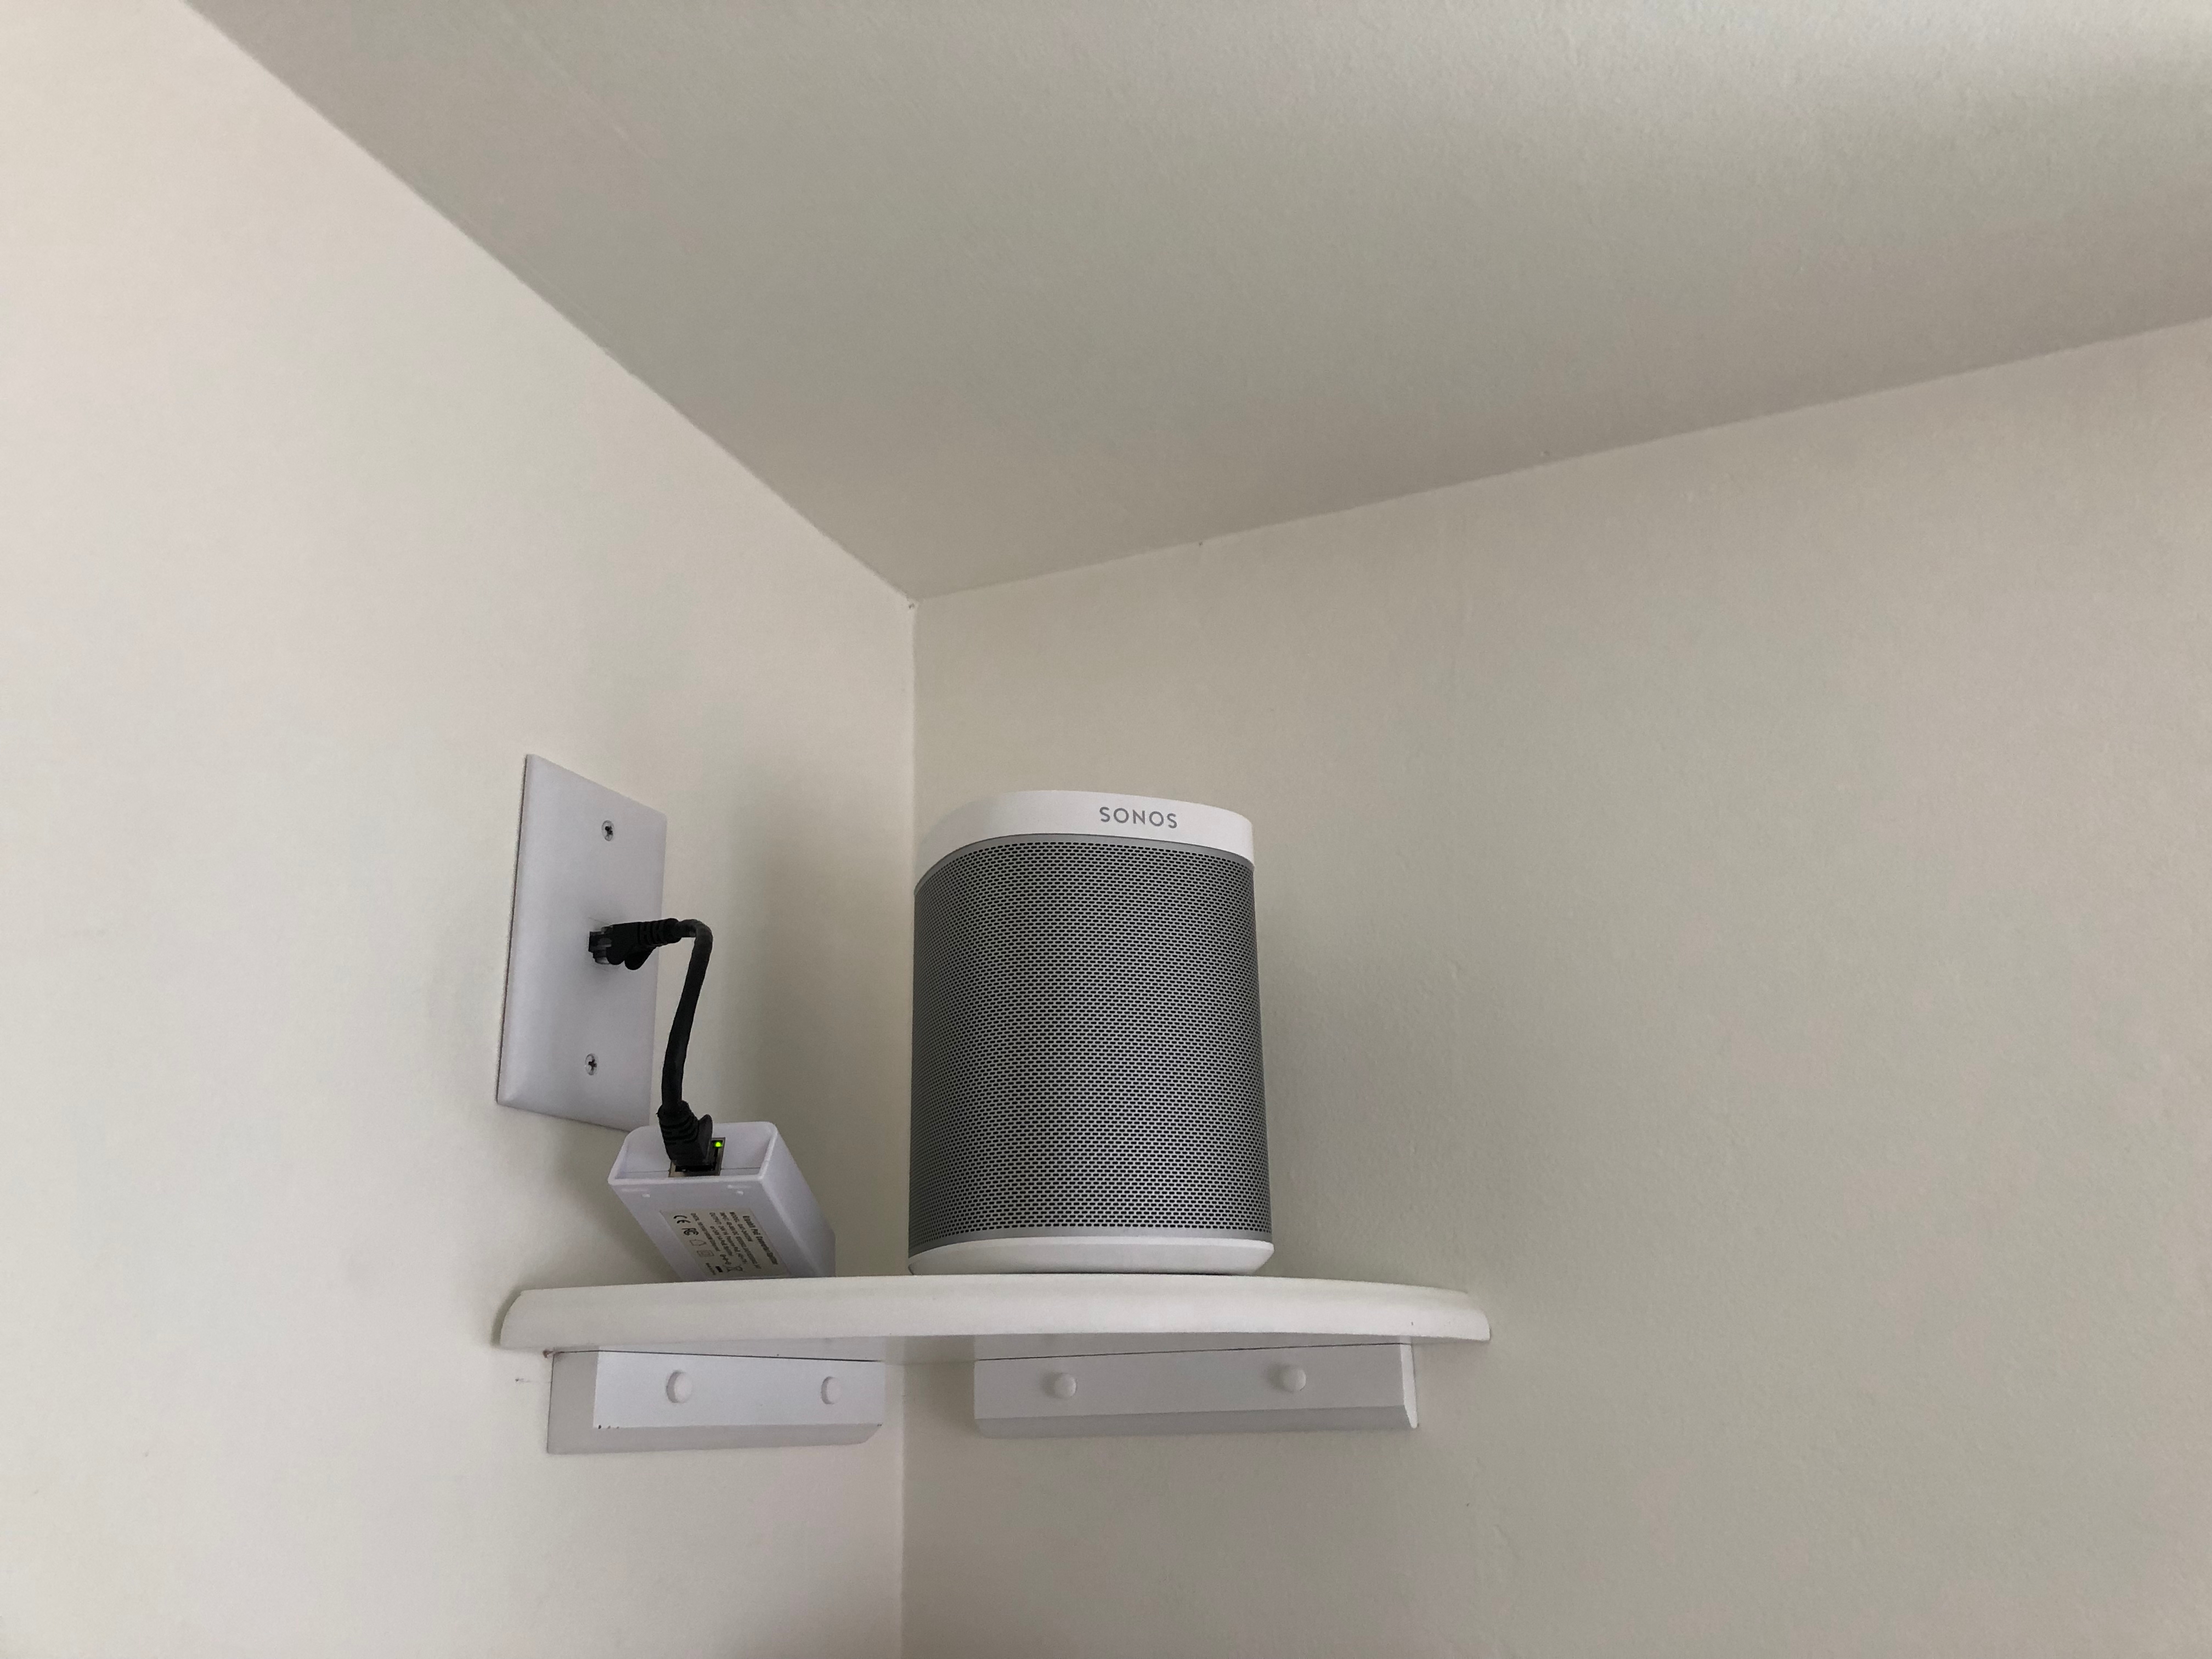
The unit works great, and it's also acting as a bridge for a Play:5 downstairs that doesn't have convenient Ethernet. I was able to cause the power supply to trip its current limit by playing dubstep at 100% volume, but that's probably something best avoided anyway 🙂