For those who have been using the Sonos proprietary(ish) file sharing built into the about-to-be-deprecated Windows desktop client (SonosLibraryShare.exe), here are the steps to enable Windows 11 ‘native’ SMB file sharing (applies to Windows 10 with some nomenclature differences). Godspeed to all.
If you’re running an up-to-date version of Windows 10 or 11, you’ll automagically get SMBv2 which is forward-compatible with Sonos. (SMBv1 and SMBv2 discussed at length elsewhere in these forums).
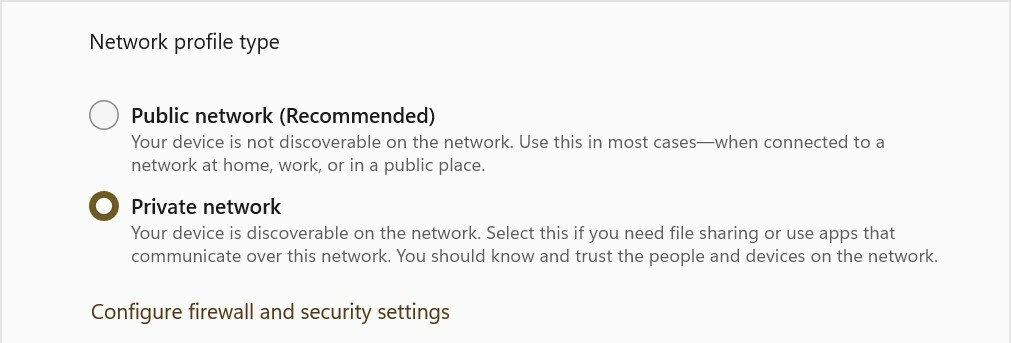
1. Switch your LAN to “Private Network”
Settings > Network & internet > Ethernet/WiFi
- Select “Private Network” radio button
2. Enable file sharing
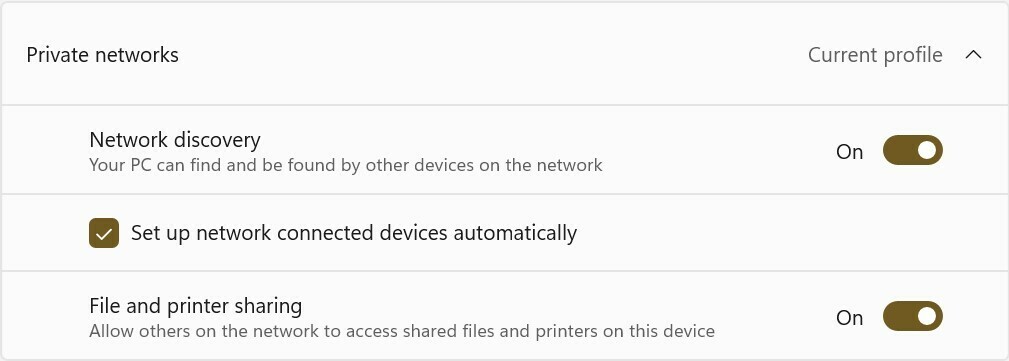
Settings > Network & internet > Advanced sharing settings
- Under “Private networks” (current profile) section
- Set “Network discovery” On
- Set “Setup network connected devices automatically” checked
- Set “File and printer sharing” On
3. Setup local account specifically for music file sharing
Oh man, I can’t tackle the whole “local account” gauntlet here, so you’ll need to Google/ChatGPT it yourself. This step might not be strictly required, tho’ it is highly recommended from a security standpoint. I’m going to name this user ‘MusicShare’.
4. Share your music folder (or drive)
- Right-click on your music folder (or drive) and select Properties from the pop-up
- Select the “Sharing” tab, and click the “Advanced Sharing” button
- Check the “Share this folder” checkbox
- Set “Share name” to ‘SonosLibrary’ (no quotes)
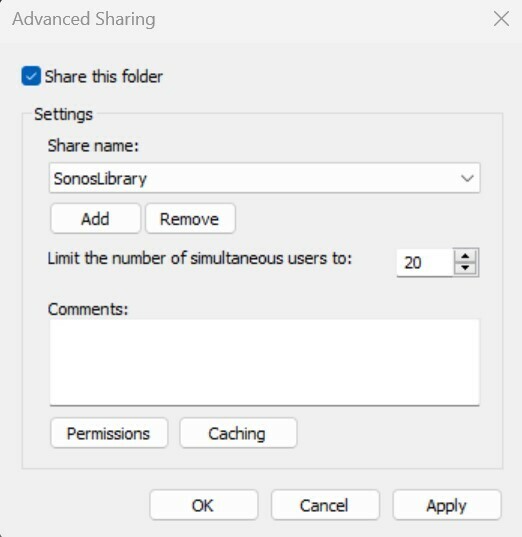
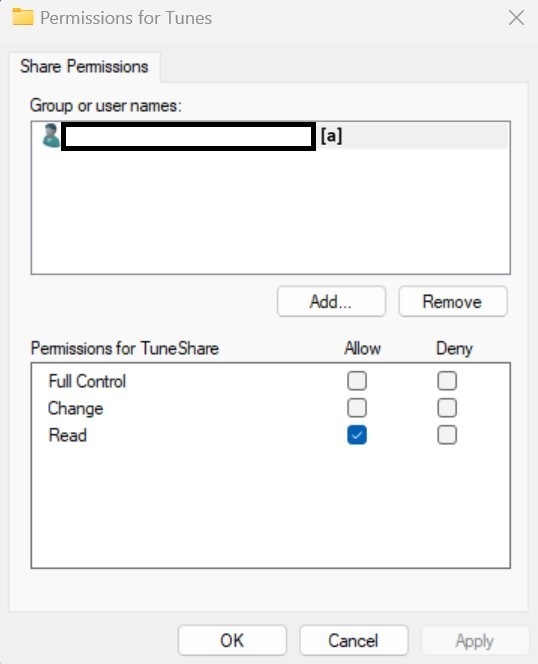
- Click the “Permissions” button
- In the pop-up under “Enter the object names to select” type ‘MusicShare’ (no quotes)
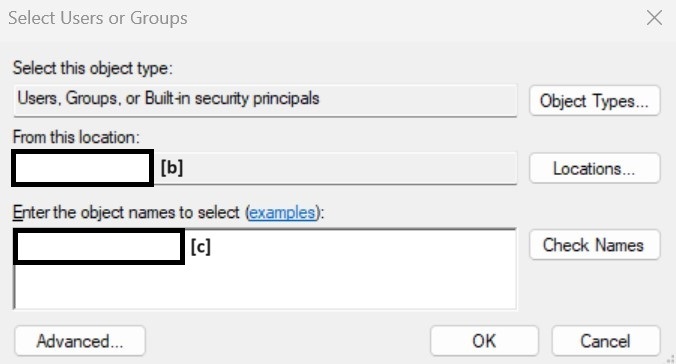
- click the “Check names” button to validate, and click the “OK” and/or “Apply” buttons to close the nest dialog boxes
5. Sonos Music Library Setup
- In the Sonos iOS or Android client, navigate to “Music Library Setup”
- Select “Add Shared Music Folder”
- Path = \\[your machine name]\SonosLibrary
- User name = MusicShare
- Password = [from Step 3]
- Cross your fingers (seriously) and wait for Music Index to build


