

Setting up a QNAP NAS for music library access
This article provides information for when your music library is unable to be added from a QNAP NAS drive. The following instructions will ensure your NAS drive is correctly set up to allow access to your music.
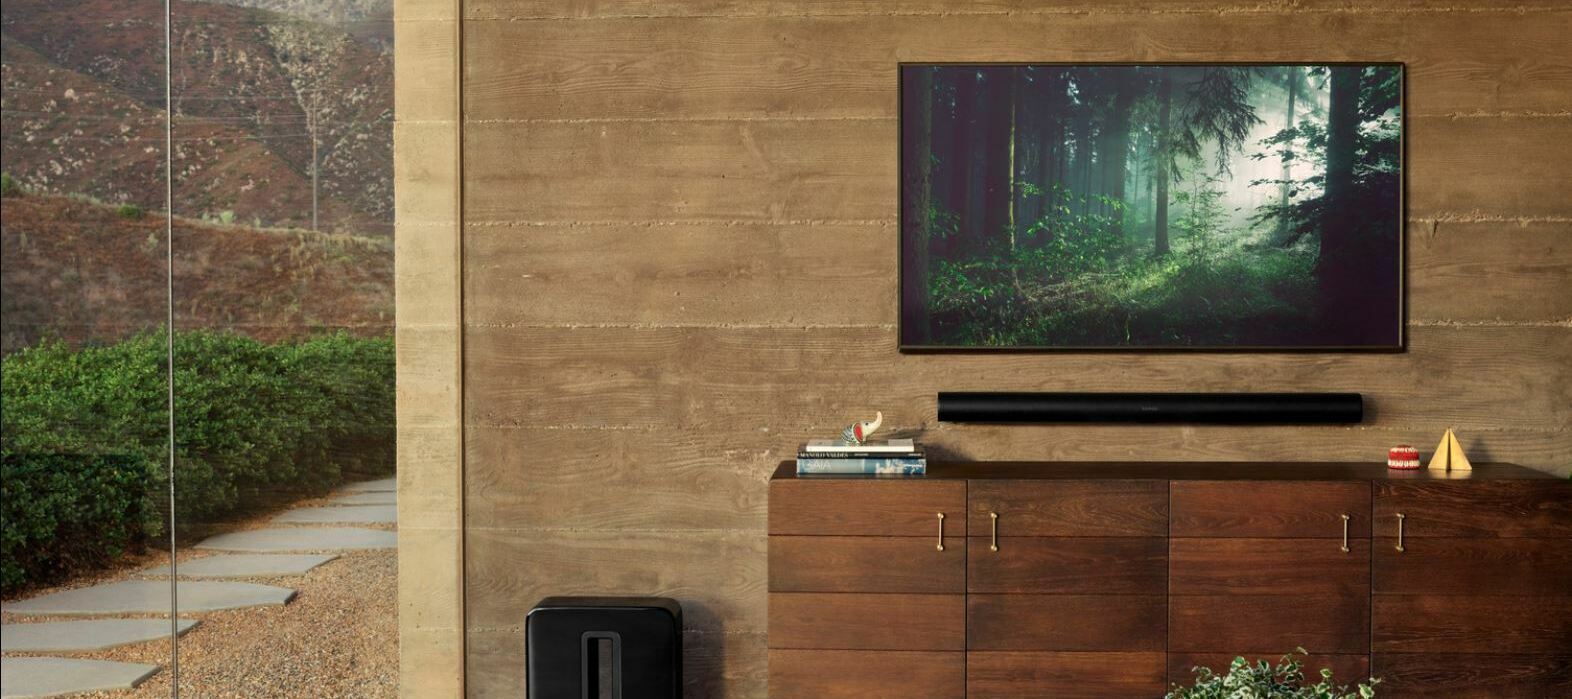
Step 1 - Check for correct SMB version (SMB2/SMB3)
- Within the NAS drive's interface, select Control Panel by selecting the three lines at the upper left corner of the UI.
- Select Network & File Services.
- Select Win/Mac/NFS/WebDAV .
- Select the Microsoft Networking (SMB) tab.
- Select the Advanced Options button.
- Make sure the Lowest and Highest is at least SMB 2 or higher.
Step 2 - Obtain the device name of the NAS
- Select Control Panel
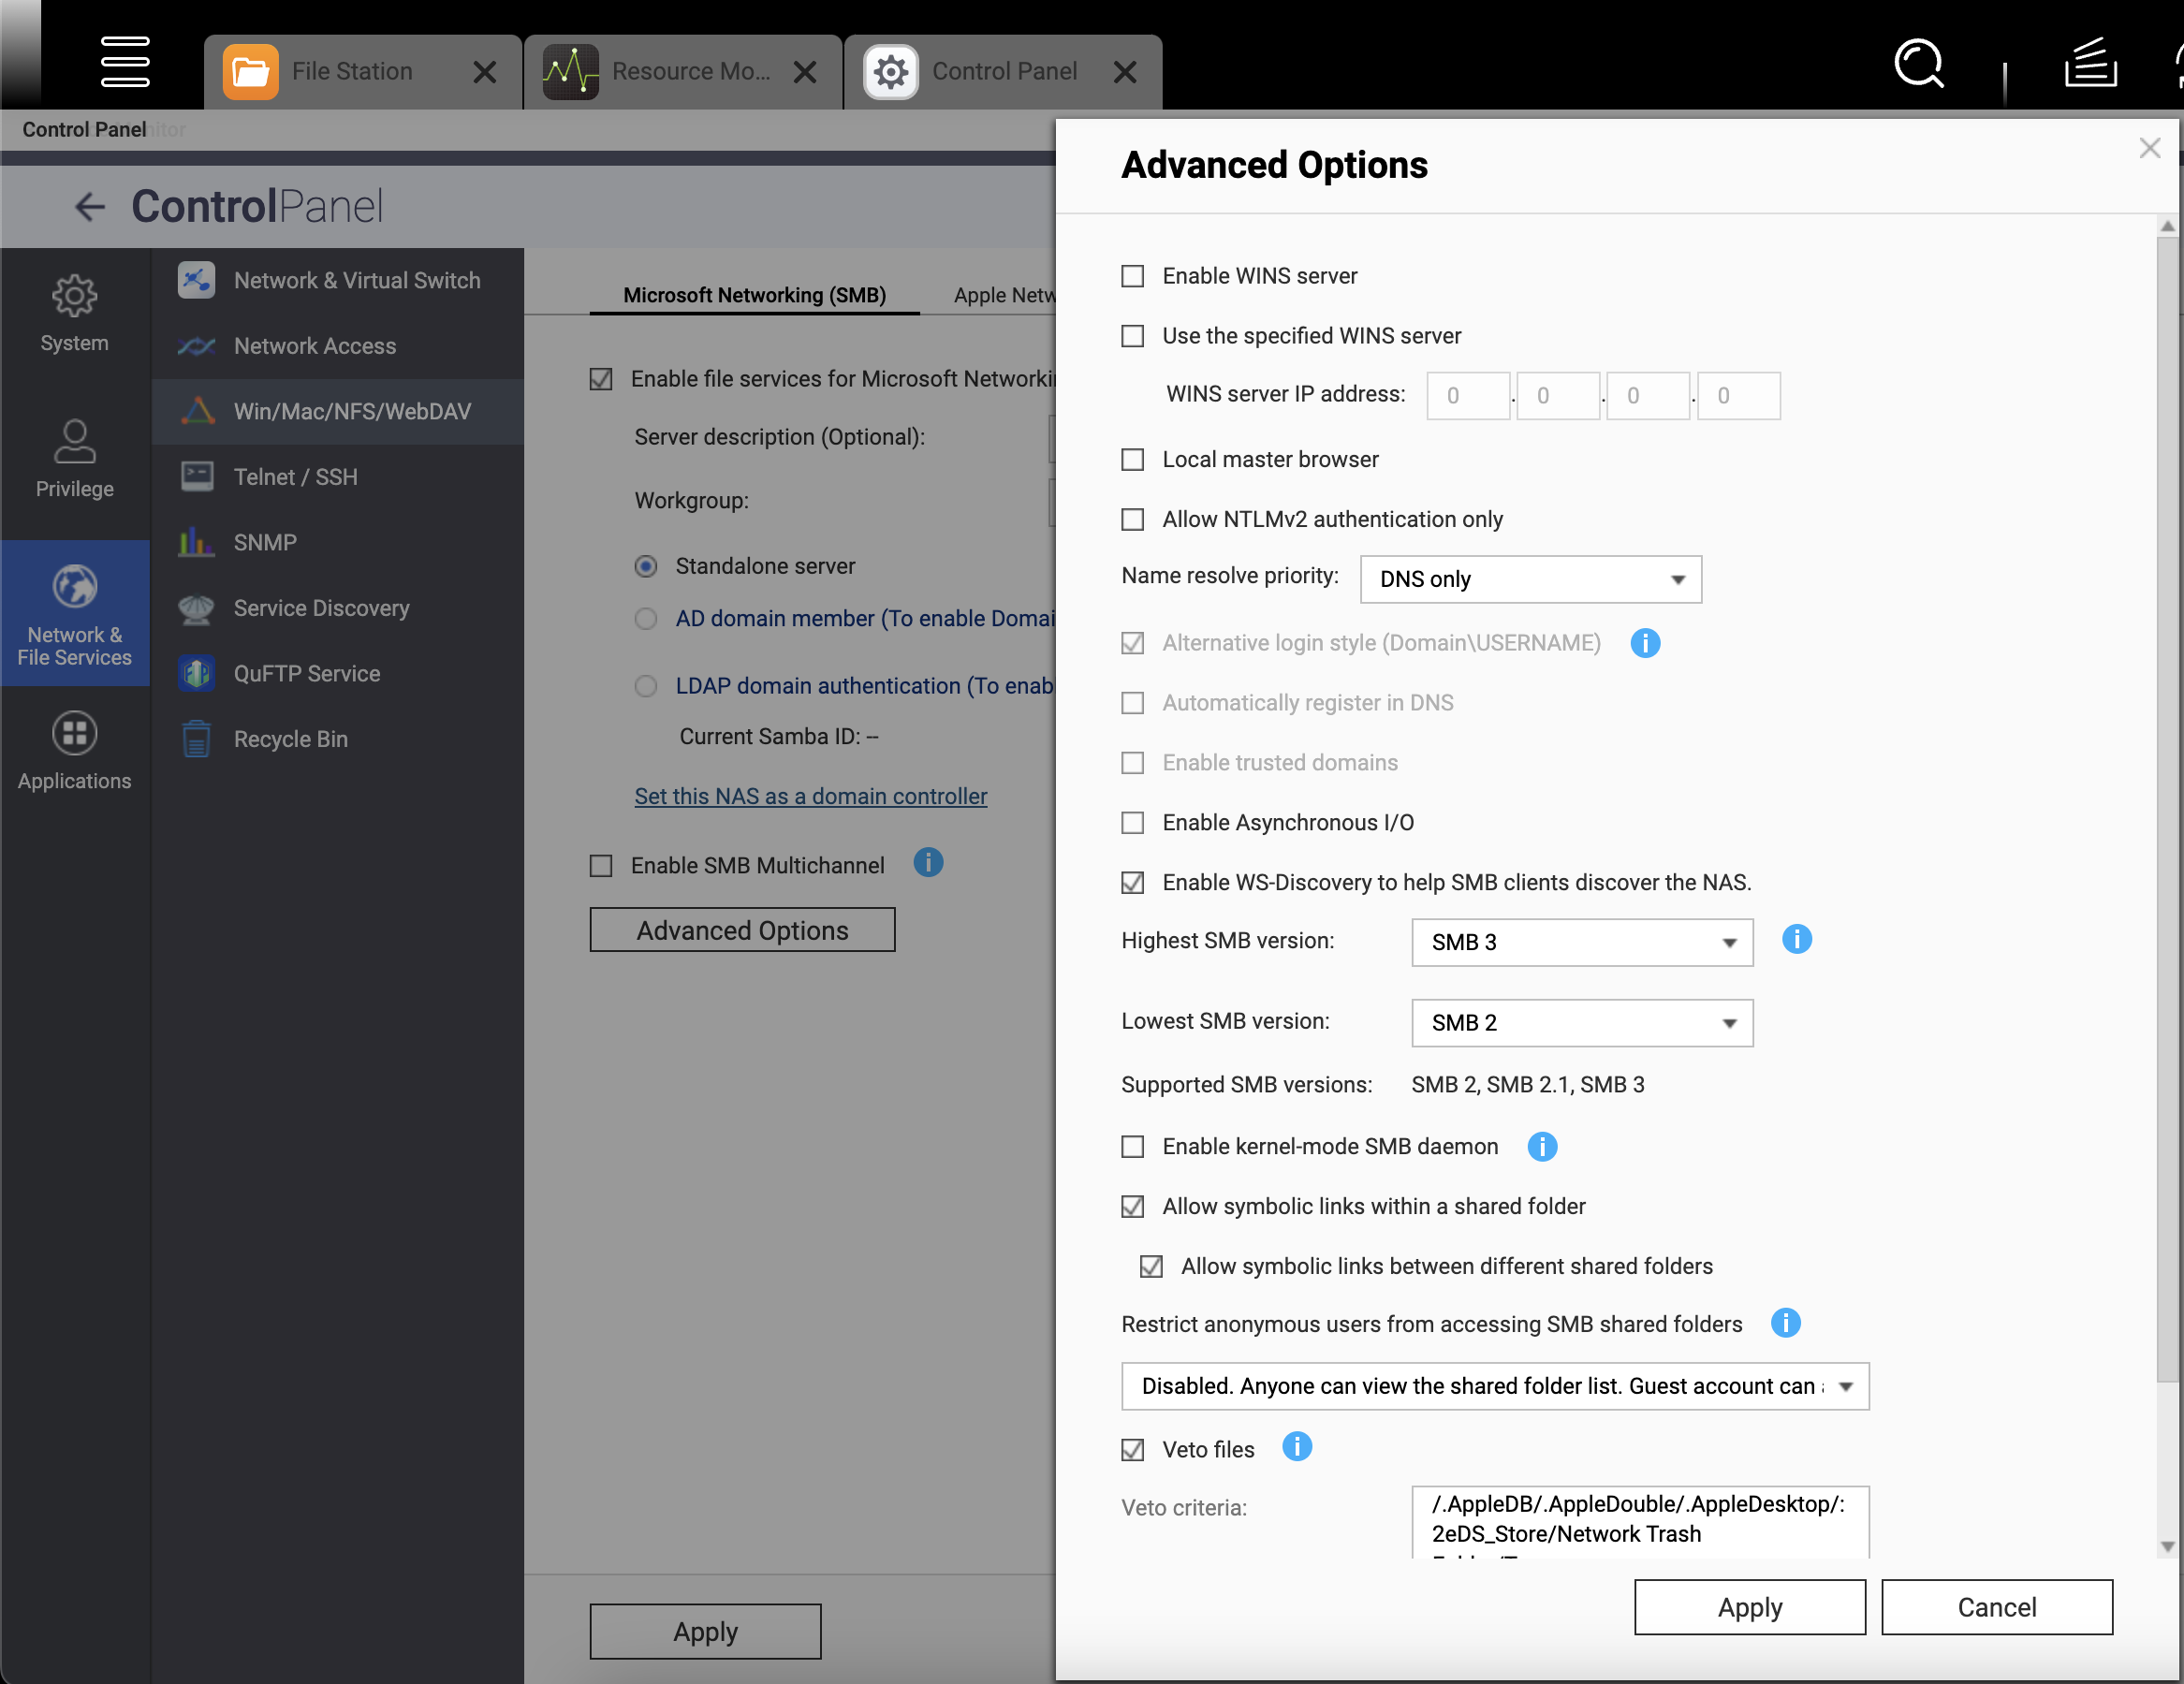
- Select System.
- Select General Settings.
- In the System Administration section look at the field that is labeled 'Server Name'.
- Take note of the server name. This will be the first part of the path that will be needed to connect to the share.
- EXAMPLE: \\ZPNAS
Step 3 - Obtain the share name on the NAS
- Select Control Panel.
- Select Privilege.
- Select Shared Folders.
- View the list of shared folders and determine which folder the music is located in.

- Take note of the share name. This will be the second part of the path that will be needed to connect to the share.
- EXAMPLE: The share name is music and the full share path will be:
- \\ZPNAS\music
- EXAMPLE: The share name is music and the full share path will be:
Step 4 - Check the NAS user has proper permissions to the share
- Select Control Panel.
- Select Privilege.
- Select Users.
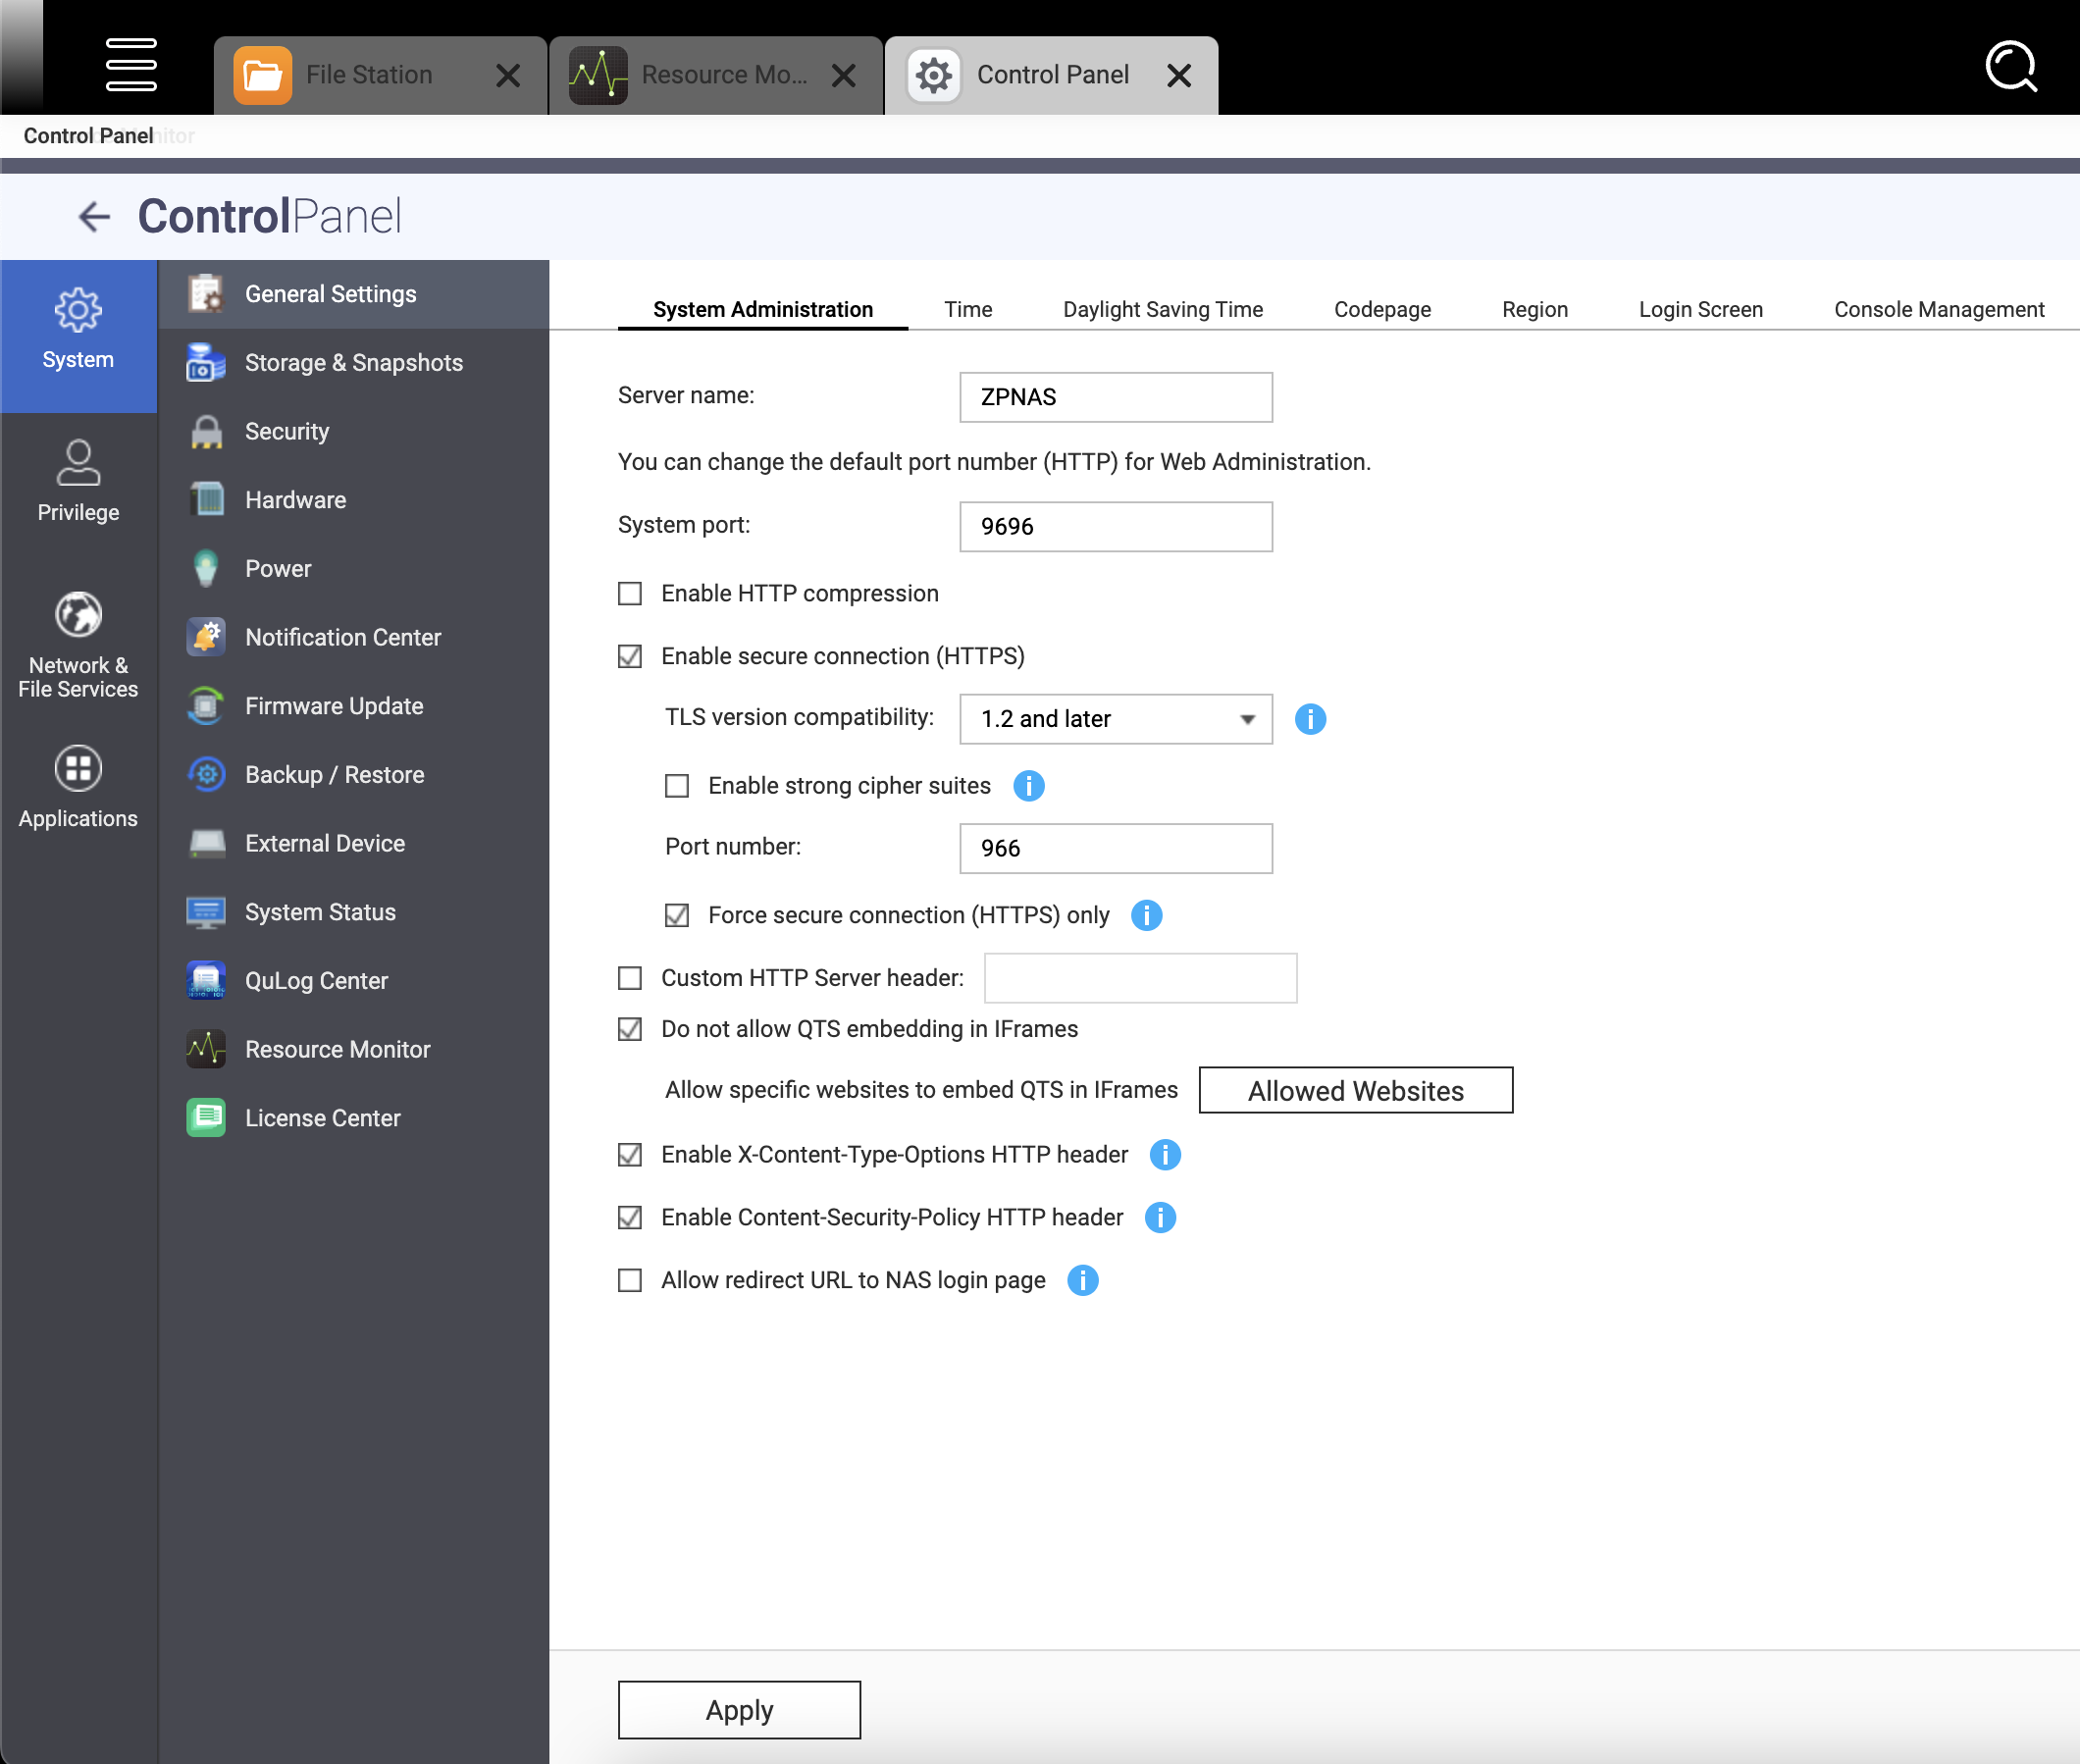
- Select the Edit Share folder Permission button.

- Make sure the proper NAS user has the correct access to the shared folder.
- Both "RO" (Read Only)" and "RW" (Read/Write) will allow the content to be accessed.
- Both "RO" (Read Only)" and "RW" (Read/Write) will allow the content to be accessed.
Step 5 - Adding the share to Sonos
- With the information you obtained from the customer's NAS as instructed above, follow the steps on the Using a NAS drive with Sonos article add the share to Sonos.
- In this example the share is \\ZPNAS\music.
Need more information about using your music library with Sonos? Then have a look here...