Answered

Access denied to Synolog NAS server – can’t play files in one room other rooms are fine?


Userlevel 2
Badge +5

Access denied to Synolog NAS server – can’t play files in one room other rooms are fine?


I am a long time user of Sonos. I have 4 zones that all uses S1. I do have a Roam also (S2) but hardly ever uses it at my home.


My zones are: 


Office: two Play 5: gen1

Livingroom: Soundbar, Sub and two Play:3

Room 3: Play:1

Room 4: Play:1


I do have a booster as well. 


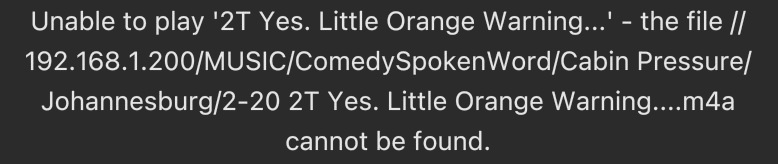
Out of the I can no longer play my music files from my Synology NAS – BUT only in my office…. I can play my files in the livingroom, room 3 and 4 – but NOT in my office.


I have tried from my MacBookPro App and from my iPhone app – but it will not play the files. Radio and streaming services are doing fine.


I can perfectly see my files/folders in the app – but access for playing is denied in my office. If I combine livingroom with office I can play the files in the office – but I can not start music from files in the office.


On my NAS I have 5 different main folders with files and it is all the same. Will not play in office but other zones are playing fine.


All systems are updated and I have rebooted computer, iPhone, modem, router, server, Play:5’s.


Can someone help me?


icon

Best answer by sjw 7 May 2023, 15:20

View original

This topic has been closed for further comments. You can use the search bar to find a similar topic, or create a new one by clicking Create Topic at the top of the page.

56 replies

Yay! Thank you!

It worked, but if you have trouble, please check your spelling. 

It didn’t work the first time and when I went back to check the file, I had written “unit extensions=no”

That will not work. 

I have a problem with the SJW mod to smb.conf file. If you reboot the NAS (DS218+) the file reverts to the previous version. So I still have a problem whereby the Play 1 works correctly but access is denied for my Connect. They both work if grouped together (sometimes).

when i got my new synology nas (never had issue with old one apart from it died), it took me ages to sort out the smb for s1 vs s2 was fine straight off.

now is denied again even though settings are as detailed. why cant sonos fix this as clearly a big problem...and sorry i dont understand the access via SSH >use PUTTY

Userlevel 2
Badge +2

aargh.. it came back. checked smb.conf and line is still there, however.

Any thoughts

p.s. It CAN see the file! It offers it! :-)


Badge

Thank you VERY much @sjw you are a super star.

I had the same issue, that Sonos iPad app suddenly started to report “access denied” when attempting to play music from my music library on my Synology NAS. Added “unix extensions=no” to the “smb.conf” of my Synology NAS DS218 solved it for me, and my old Sonos S1 system now works again.

Curious @sjw, how did you figure out this was the solution??

Userlevel 2
Badge +2

Add me to the list of grateful users… I have a mix of newer and older Sonos products, and this has been driving me nuts! Thanks

WOW Great! I have been trying to resolve this issue for weeks! I followed your instructions I can now play all my music library's…………….. your a legend! Thanks

OK great, I’ll put all the instructions into one post.

Connect to the NAS via SSH (use PUTTY). (you may have to enable SSH in the NAS Control Panel)

Type sudo -i  (note the space after sudo).

Press enter. (it should give a slightly humorous prompt).

Type the root password.

Type cd /etc/samba  Press enter

Then type ls -al (they are lowercase L’s)

It should list the smb.conf file.

Type cp smb.conf smb.conf.backup  (that gives you a backup)

Now type:

vi smb.conf    Press enter

This takes you into a text editor in the smb.conf file

Check the line unix extensions=no isn’t already there.

Now press the down arrow until you reach the end of the file.

Type the letter o.  It should put the cursor below the last line - and you can now insert text.

Type the line unix extensions=no

Then press the esc key (top left of keyboard) a couple of times.

Now press the : key.  (Shift ;)

The cursor should go to the bottom of the file.

Type wq and then enter.

That writes the changes and quits out of the text editor.

The change is now made.

If anything seems to go wrong when you are in the file, press escape a couple of times, then : and then q! and enter.  This will quit the editor and make no changes.

Karstenjensen:dk


I’m sorry.  I forgot a step.

After clicking the SSH enable box you have to click the Apply button in the lower right corner of your screen.

Sorry.  I’m old.  I forget stuff, sometimes.👴🏻   


Karstenjensen:dk


I’m sorry.  I forgot a step.

After clicking the SSH enable box you have to click the Apply button in the lower right corner of your screen.

Sorry.  I’m old.  I forget stuff, sometimes.👴🏻   


WOW Great! I have been trying to resolve this issue for weeks! I followed your instructions I can now play all my music library's……………..Karstenjensen:dk your a legend! Thanks

Karstenjensen:dk


I’m sorry.  I forgot a step.

After clicking the SSH enable box you have to click the Apply button in the lower right corner of your screen.

Sorry.  I’m old.  I forget stuff, sometimes.👴🏻   


Userlevel 7
Badge +15

All I would say is disabling it again can't do any harm..? If your NAS isn't exposed to the Internet it's not an issue anyway but at the end of the day we should all reduce our exposure to risks..

So sjw I was wondering.

Is an enabled SSH a security risk?  After executing your guide should we disable SSH so no one else can get in that way?

Just curious.

Karstenjensen.dk:   

My Sonos stuff is old and it worked perfectly for me.  I can’t praise sjw enough. 

You turn on the SSH in your Synology control panel via your ...direct.quickconnect.to... connection to your server.  Once you are logged in:

Click on Control Panel

Click on Terminal & SNMP, it should come up on the terminal screen and you will see Enable SSH service.  Click the box.  If you don’t see Enable SSH sevice then check the tab above to make sure you are in the Terminal screen and not the SNMP screen.

Once you click the box SSH is enabled.

Google “Putty” and read about how it works and then download it and install it and start it. 

Once you do that follow sjw’s instructions and type them in EXACTLY as written.  (I left out a space on the cd command and was momentarily sad.)

The length of the instruction post looks intimidating but it is easy.  Just take it one step at a time.  Especially intimidating is the “humorous” UNIX/Linix?  message when you crank up the text editor.  It may be humorous to a Unix wiz but it even made this old VMS guy take a deep breath.  But just chill and go with the flow.  

The instructions work perfectly. Take them a step at a time. 

Userlevel 7
Badge +15

You need to enable ssh and follow the Guide posted.

Depending on how Synology do updates would decide if they change the conf file each time but the setting would be changeable again.

Userlevel 2
Badge +5

I just don’t know how to Connect to the NAS via SSH….


And will it work the next time Synolog makes a new firmware update?

Another satisfied user.  Thank-you jsw!

Thanks to @sjw for the instructions - you have helped extend the life of the v1 Connect in my home office for hopefully another year or two. 

Userlevel 2
Badge +2

Linux has a hold command to stop apt-get update for a specific package. Alternatively, I flashed an image of the pi disc to my computer that I can revert to if it goes wrong again.

Like so many others, I have a signig=ficant investment in Sonos S1 hardware. This enables my family to continue using the speakers with our NAS.

THANKS sjw -- Not all heroes wear capes!


Question…

Should I avoid future SMB service updates?

Userlevel 2
Badge +2

Adding ‘unix extensions=no to smb.conf worked for me, sonos S1 accessing usb ssd on a pi3b+ running ubuntu sever. Thanks

Thank you, gyus, for this solution. It works for me as well on the most recent release of my Synology NAS. Big relief for my family.

Thanks heaps for this answer. 


sjw wrote:

Thanks sjw, initially I had rolled back the SMB package to an earlier version to fix the “access denied” problem but your SMB.conf tweak using the latest SMB is obviously a more elegant solution.

Userlevel 1

Hello,

I have 8 rooms; Synology DS920 NAS; 3 rooms couldn’t play music from the NAS; getting the “access denied” error; I am using Windows 10 Home on a Dell XPS 13; Sonos S1 app

I had removed and added NAS music folders as well as re-booted the offending Sonos speakers in the 3 rooms - that didn’t help

I followed the Connect to the NAS via SSH (use PUTTY) from @sjw and then rebooted the NAS and everything worked. FYI, my root pswd was the same as the initial login pswd.  

Thanks, Mike

Userlevel 1

OK great, I’ll put all the instructions into one post.

Connect to the NAS via SSH (use PUTTY). (you may have to enable SSH in the NAS Control Panel)

Type sudo -i  (note the space after sudo).

Press enter. (it should give a slightly humorous prompt).

Type the root password.

Type cd /etc/samba  Press enter

Then type ls -al (they are lowercase L’s)

It should list the smb.conf file.

Type cp smb.conf smb.conf.backup  (that gives you a backup)

Now type:

vi smb.conf    Press enter

This takes you into a text editor in the smb.conf file

Check the line unix extensions=no isn’t already there.

Now press the down arrow until you reach the end of the file.

Type the letter o.  It should put the cursor below the last line - and you can now insert text.

Type the line unix extensions=no

Then press the esc key (top left of keyboard) a couple of times.

Now press the : key.  (Shift ;)

The cursor should go to the bottom of the file.

Type wq and then enter.

That writes the changes and quits out of the text editor.

The change is now made.

If anything seems to go wrong when you are in the file, press escape a couple of times, then : and then q! and enter.  This will quit the editor and make no changes.

Thanks champion!!!

Userlevel 1

OK great, I’ll put all the instructions into one post.

Connect to the NAS via SSH (use PUTTY). (you may have to enable SSH in the NAS Control Panel)

Type sudo -i  (note the space after sudo).

Press enter. (it should give a slightly humorous prompt).

Type the root password.

Type cd /etc/samba  Press enter

Then type ls -al (they are lowercase L’s)

It should list the smb.conf file.

Type cp smb.conf smb.conf.backup  (that gives you a backup)

Now type:

vi smb.conf    Press enter

This takes you into a text editor in the smb.conf file

Check the line unix extensions=no isn’t already there.

Now press the down arrow until you reach the end of the file.

Type the letter o.  It should put the cursor below the last line - and you can now insert text.

Type the line unix extensions=no

Then press the esc key (top left of keyboard) a couple of times.

Now press the : key.  (Shift ;)

The cursor should go to the bottom of the file.

Type wq and then enter.

That writes the changes and quits out of the text editor.

The change is now made.

If anything seems to go wrong when you are in the file, press escape a couple of times, then : and then q! and enter.  This will quit the editor and make no changes.


Thank you very much. After the update Synology my Sonos system failed, but with this help it's working again. You're a genius!