Access denied to Synolog NAS server – can’t play files in one room other rooms are fine?


I am a long time user of Sonos. I have 4 zones that all uses S1. I do have a Roam also (S2) but hardly ever uses it at my home.


My zones are: 


Office: two Play 5: gen1

Livingroom: Soundbar, Sub and two Play:3

Room 3: Play:1

Room 4: Play:1


I do have a booster as well. 


Out of the I can no longer play my music files from my Synology NAS – BUT only in my office…. I can play my files in the livingroom, room 3 and 4 – but NOT in my office.


I have tried from my MacBookPro App and from my iPhone app – but it will not play the files. Radio and streaming services are doing fine.


I can perfectly see my files/folders in the app – but access for playing is denied in my office. If I combine livingroom with office I can play the files in the office – but I can not start music from files in the office.


On my NAS I have 5 different main folders with files and it is all the same. Will not play in office but other zones are playing fine.


All systems are updated and I have rebooted computer, iPhone, modem, router, server, Play:5’s.


Can someone help me?


I have acces to the folders in my Office. But when Sonos i trying to play the files it says it cannot play the file because access is denied and it skips to the next file quickly and then the same error occurs.

And all other parts of my home I can play my files.

But the problem is I have not altered any settings lately. It just suddenly occurred.

Do you understand what I’m saying?


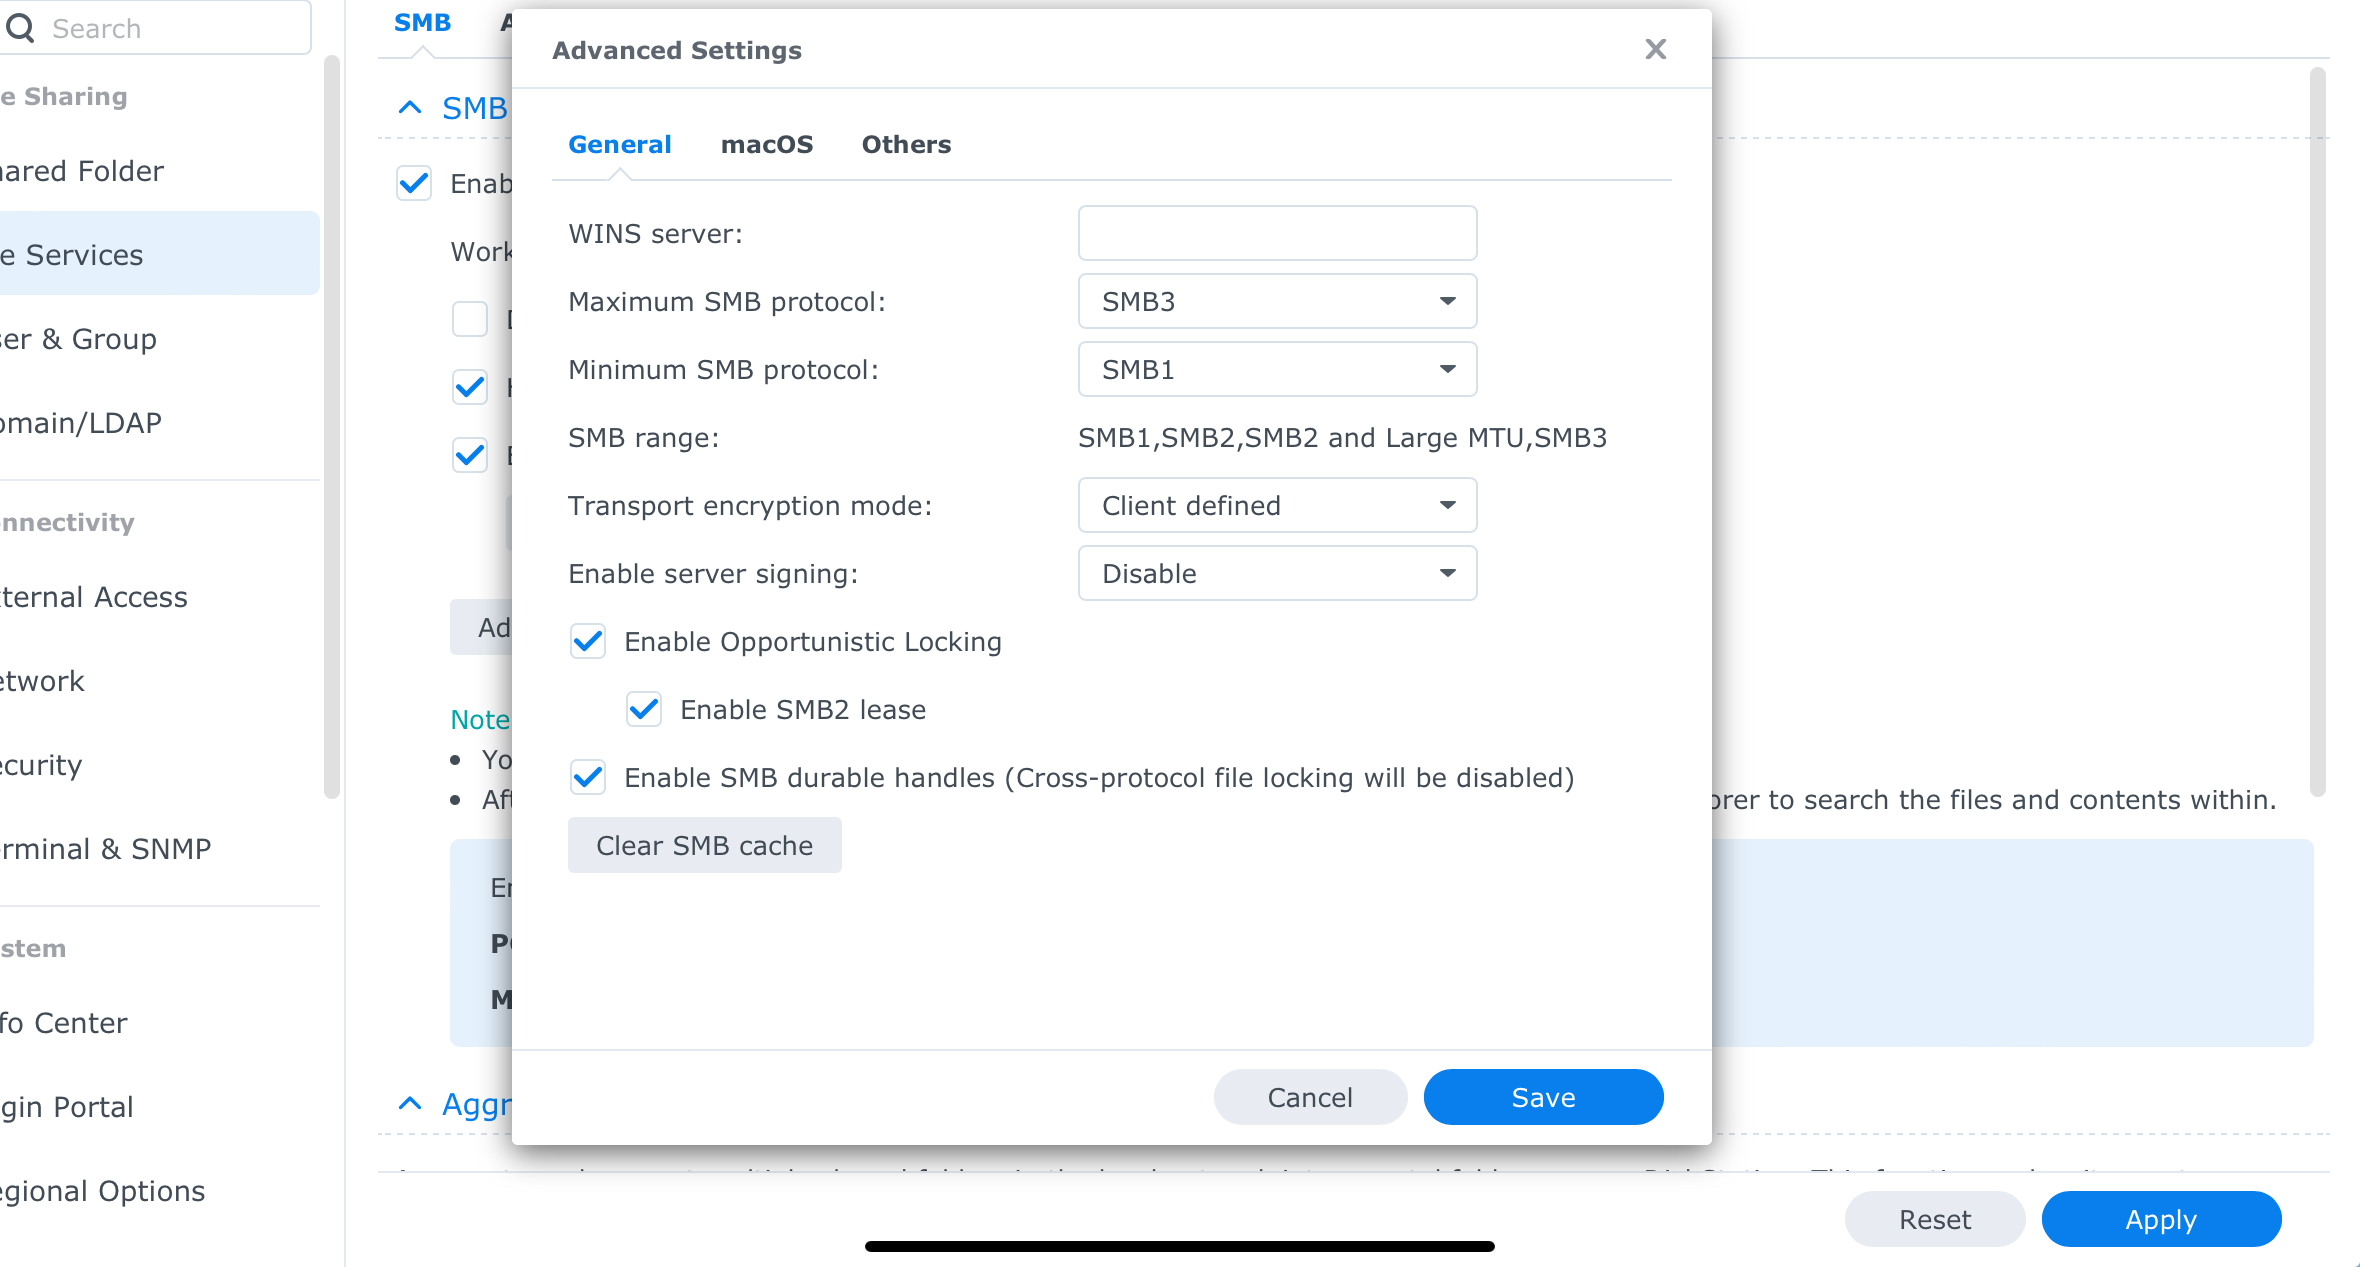
S1 App required the SMB v1 sharing protocol, so ensure the NAS is not set to v2, or higher.

I seem to recall from other posts here in the community that on the NAS box its as follows…

Goto the SMB settings under File Services, then Advanced, and then ‘Other’.  There is a setting called enable NTLMv1 authentication.  Once you do, you will get a nasty warning message about potential vulnerabilities with this aging standard.  Continue and enable the setting and it should then work.

I’m just not sure if the instructions above apply to your NAS model. If not, then maybe check the user manual and check the SMB version.


I just don’t know how to Connect to the NAS via SSH….


And will it work the next time Synolog makes a new firmware update?


SMB3 and SMB1 is already enabled


Thank you, gyus, for this solution. It works for me as well on the most recent release of my Synology NAS. Big relief for my family.


Are you able to Update your Library?


Adding ‘unix extensions=no to smb.conf worked for me, sonos S1 accessing usb ssd on a pi3b+ running ubuntu sever. Thanks


Like so many others, I have a signig=ficant investment in Sonos S1 hardware. This enables my family to continue using the speakers with our NAS.

THANKS sjw -- Not all heroes wear capes!


Question…

Should I avoid future SMB service updates?


Karstenjensen.dk:   

My Sonos stuff is old and it worked perfectly for me.  I can’t praise sjw enough. 

You turn on the SSH in your Synology control panel via your ...direct.quickconnect.to... connection to your server.  Once you are logged in:

Click on Control Panel

Click on Terminal & SNMP, it should come up on the terminal screen and you will see Enable SSH service.  Click the box.  If you don’t see Enable SSH sevice then check the tab above to make sure you are in the Terminal screen and not the SNMP screen.

Once you click the box SSH is enabled.

Google “Putty” and read about how it works and then download it and install it and start it. 

Once you do that follow sjw’s instructions and type them in EXACTLY as written.  (I left out a space on the cd command and was momentarily sad.)

The length of the instruction post looks intimidating but it is easy.  Just take it one step at a time.  Especially intimidating is the “humorous” UNIX/Linix?  message when you crank up the text editor.  It may be humorous to a Unix wiz but it even made this old VMS guy take a deep breath.  But just chill and go with the flow.  

The instructions work perfectly. Take them a step at a time. 


So sjw I was wondering.

Is an enabled SSH a security risk?  After executing your guide should we disable SSH so no one else can get in that way?

Just curious.


I am having the same problems on my DS216play. All worked fine until the latest update. I am now on DSM 7.1.1-42962 (Update 5).


Any suggestions to solve this are highly appreciated.


Did you look at the threads that @sjw linked above?


Yes, I did. I checked my settings, but the problem still stays.


I have to correct myself, I cannot play music from any of my SONOS-players. 


I get the message: unnable to play …. - access tp //,,,,, denied.


Again, I have to correct myself. Apologies,

I checked again and I noticed the problem occurs on my Sonos 5 (Gen 1) and on my Sonos Connect. it works fine on my Sonos 1 (Gen 1).

Again apologies for my inaccuracy.


Karstenjensen:dk


I’m sorry.  I forgot a step.

After clicking the SSH enable box you have to click the Apply button in the lower right corner of your screen.

Sorry.  I’m old.  I forget stuff, sometimes.👴🏻   


OK great, I’ll put all the instructions into one post.

Connect to the NAS via SSH (use PUTTY). (you may have to enable SSH in the NAS Control Panel)

Type sudo -i  (note the space after sudo).

Press enter. (it should give a slightly humorous prompt).

Type the root password.

Type cd /etc/samba  Press enter

Then type ls -al (they are lowercase L’s)

It should list the smb.conf file.

Type cp smb.conf smb.conf.backup  (that gives you a backup)

Now type:

vi smb.conf    Press enter

This takes you into a text editor in the smb.conf file

Check the line unix extensions=no isn’t already there.

Now press the down arrow until you reach the end of the file.

Type the letter o.  It should put the cursor below the last line - and you can now insert text.

Type the line unix extensions=no

Then press the esc key (top left of keyboard) a couple of times.

Now press the : key.  (Shift ;)

The cursor should go to the bottom of the file.

Type wq and then enter.

That writes the changes and quits out of the text editor.

The change is now made.

If anything seems to go wrong when you are in the file, press escape a couple of times, then : and then q! and enter.  This will quit the editor and make no changes.

Karstenjensen:dk


I’m sorry.  I forgot a step.

After clicking the SSH enable box you have to click the Apply button in the lower right corner of your screen.

Sorry.  I’m old.  I forget stuff, sometimes.👴🏻   


Karstenjensen:dk


I’m sorry.  I forgot a step.

After clicking the SSH enable box you have to click the Apply button in the lower right corner of your screen.

Sorry.  I’m old.  I forget stuff, sometimes.👴🏻   


WOW Great! I have been trying to resolve this issue for weeks! I followed your instructions I can now play all my music library's……………..Karstenjensen:dk your a legend! Thanks


WOW Great! I have been trying to resolve this issue for weeks! I followed your instructions I can now play all my music library's…………….. your a legend! Thanks


It isn't a ‘check settings’ thing, you need to make (slightly technical) changes to your NAS.  Second link gives them.


Thanks for the quick reply. I checked the second link but I am not sure what the technical changes  are that you refer to. I see several options mentioned (downgrade SMB, which I do not want to do - add unix extension etc.)

Can you be please be more specific on what I can/should do?

Again thanks.


aargh.. it came back. checked smb.conf and line is still there, however.

Any thoughts

p.s. It CAN see the file! It offers it! :-)


Thanks for the links. Makes sense but I\m not really interested ind neither ditch my Play 5 speaker for new expensive ones or down grade SMB on my NAS. Hopefully Sonos and Synology will come up with a good solution.


Tomorrow I will call the support and ask them what to do…...


I logged in using SSH, but now I am stuck. I see my username@NASname: $

Do you have any other instructions (in detail) how to get to the smb.conf file and how to change it?

Thanks for your help.


Which model NAS do you have?  Do you know the ‘root’ password?  This is the main admin account.

Assuming you do, at the prompt, type

sudo -i  (note the space after sudo).

Press enter. (it should give a slightly humorous prompt).

Type the root password.

Post back when you have done this.


Thanks to @sjw for the instructions - you have helped extend the life of the v1 Connect in my home office for hopefully another year or two.