
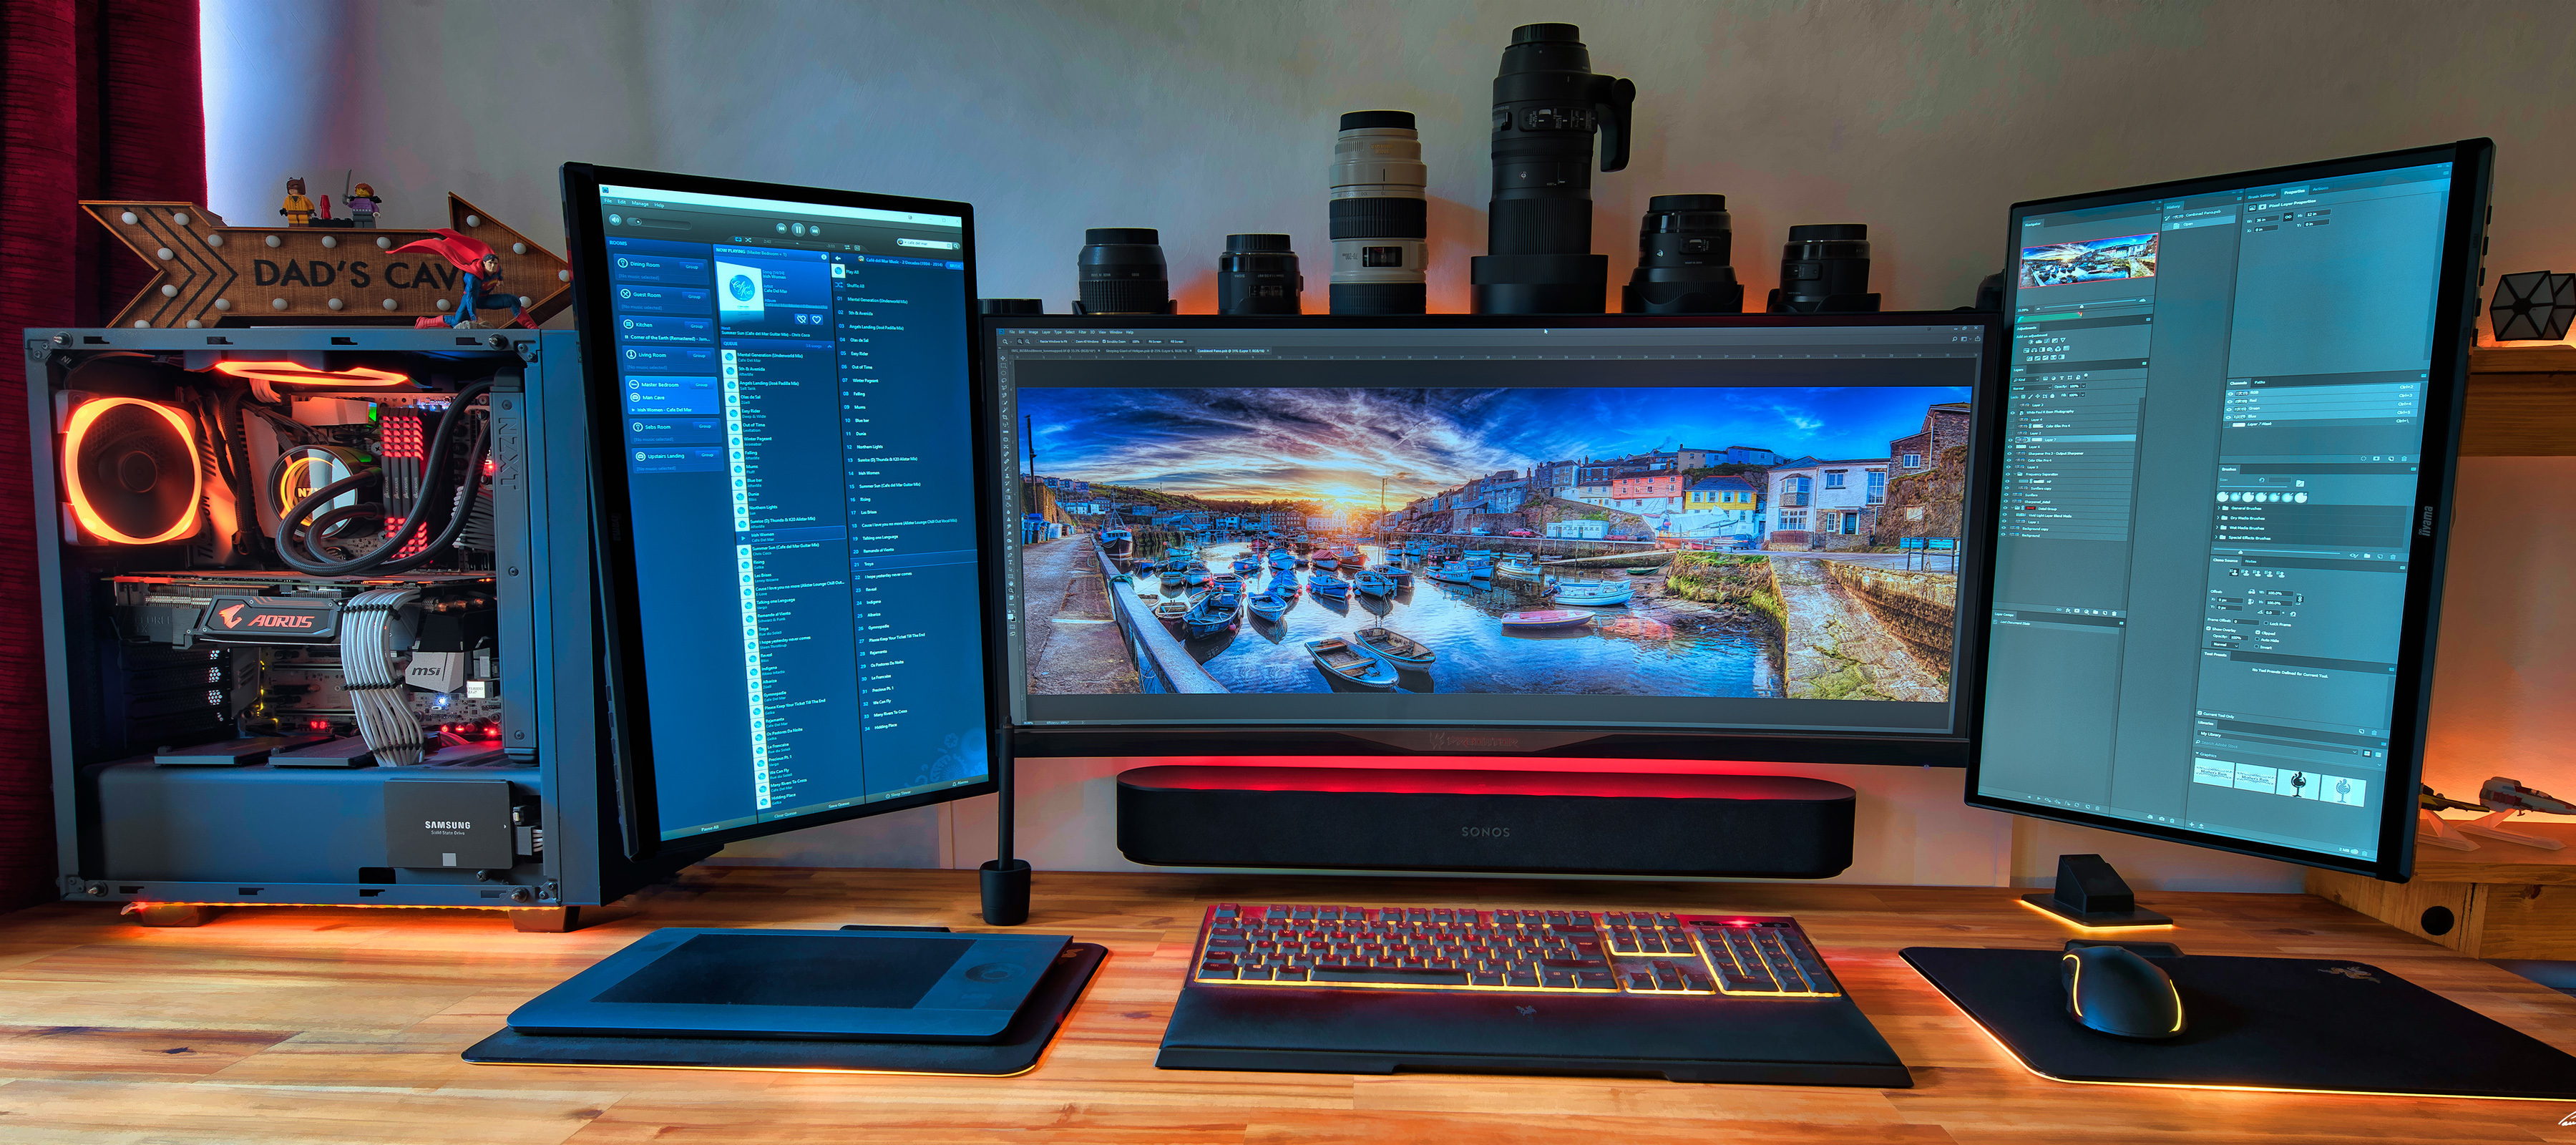

Image provided by PaulRBoon in this thread: Beam as computer speaker
At Sonos, we don’t make speakers specifically designed for your computer. However, if you are considering integrating your computer sound into your Sonos system, we want to help you get the most out of your products. With this being said, not all computers are built equal, so your mileage may vary, therefore it’s unfortunately not something Sonos can help or support you with setting up outside the general advice here.
In this article, we are going to be focusing on the best ways to get your computer audio coming through a Sonos Playbar, Playbase, Ray, Beam, Arc, Amp, Move, Roam, Era 100 & Era 300. To get this to work, there are two things to look at: how to connect the products and the settings needed.
A quick note on Play:5, Five, Connect:Amp, Amp, Port, Connect, Era 100 & Era 300
While it is possible to use these players with a PC by connecting to their line-in ports (Era models will need the USB-C adaptor), this isn’t a recommended solution if you’re planning on doing something that requires audio/video synchronization. There will be a minimum of a 75ms delay on the audio due to the signal processing performed on the line-in side. If synchronization isn’t an issue for you, you can simply connect the device to your PCs headphone or line out jack like you would a pair of regular headphones.
Roam & Era 100/300
Bluetooth links via these models will experience the same delay, as Bluetooth acts as a virtual line-in and also needs buffered for network play.
Connecting:
Depending on the product you’re trying to connect, the method of connecting it to your computer will be slightly different. I’ll group the products with similar connections together to make things a bit easier to follow.
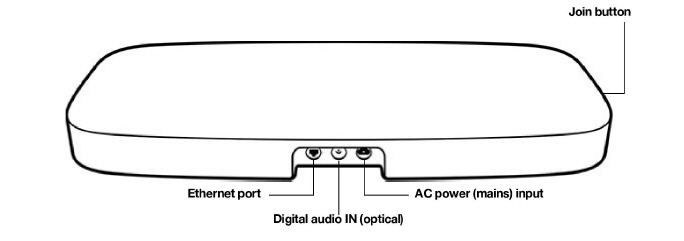
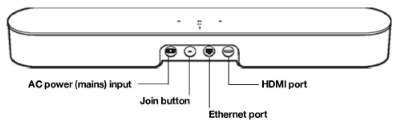
Playbar, Playbase & Ray
These products use a TOSLINK/Optical cable to receive audio, so if you’re looking to use these as PC speakers, your PC must be equipped with an Optical Out port. Most PCs don’t come with these built into the motherboard, though some higher end ones do. In most cases, you’ll likely need to use an internal sound card to provide that connection. Simply use an Optical cable to link your Playbar/Playbase/Ray to the Optical out port on your computer; just like you would to hook it up to a TV.

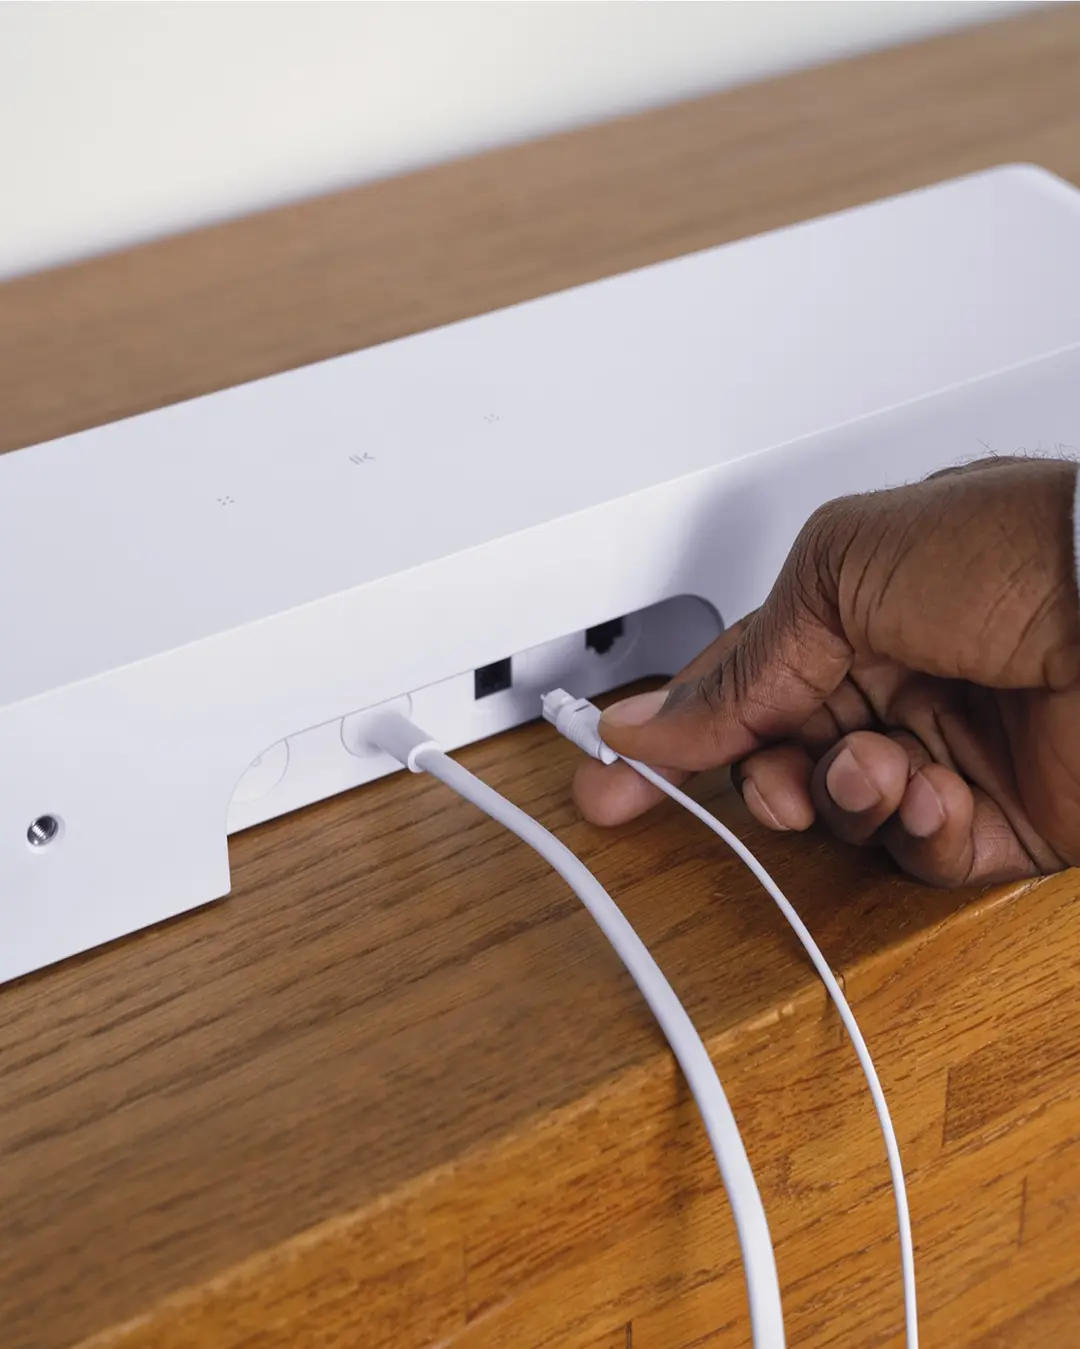
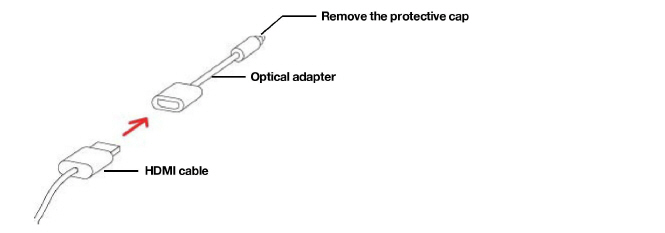
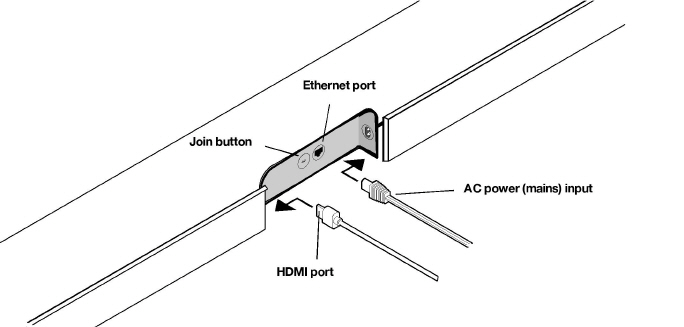
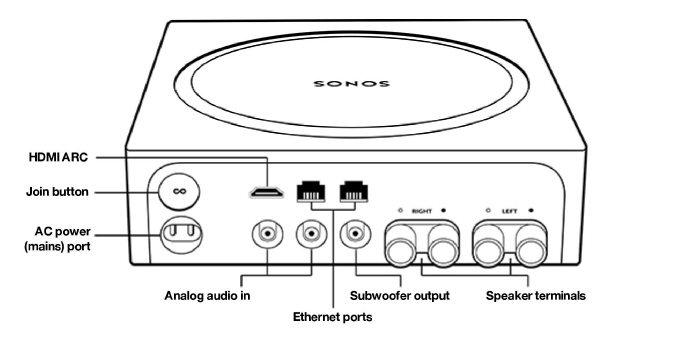
Beam, Arc & Amp
If you’re using a Beam, Arc or Amp as computer speakers, there’s one extra step. You’ll need to make use of the Sonos Optical Audio Adapter that is included with your product (excluding Amp). Most computers send a regular HDMI audio stream over their HDMI ports, whereas these products require an HDMI-ARC audio signal. These are not the same. Unless you are using a TV equipped with HDMI-ARC as your monitor, connecting via HDMI-ARC won’t be possible. If that does apply to you, you can check this FAQ to find out how to set up your Beam, Arc or Amp.
With Amp, you also have the option to use the RCA Line-In ports, though you should be aware that there will be a minimum of 75ms delay due to the signal processing performed on this input. Therefore, it’s generally a better experience to use the HDMI ARC port with the optical adapter.
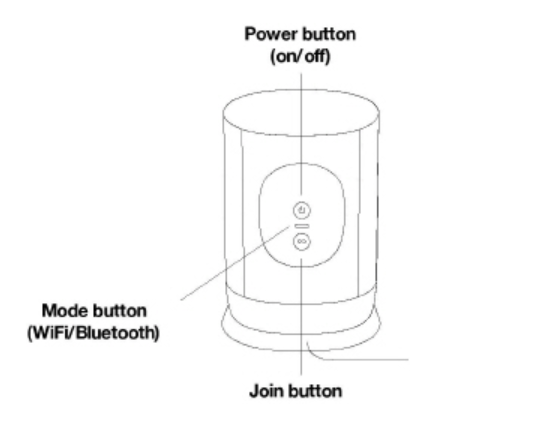
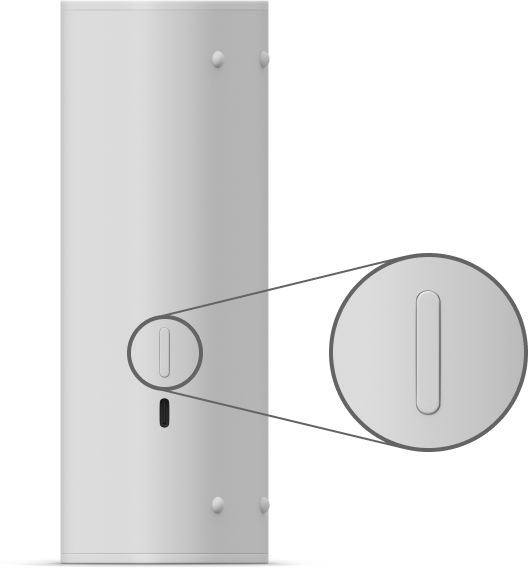
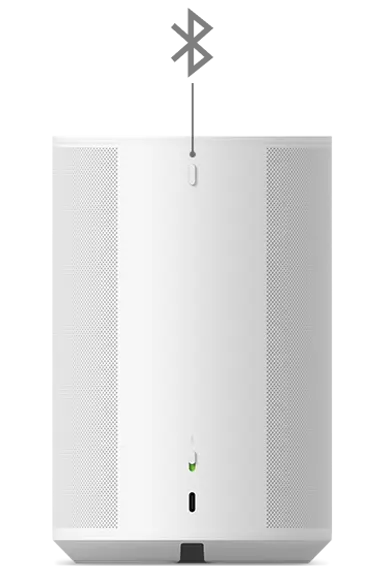
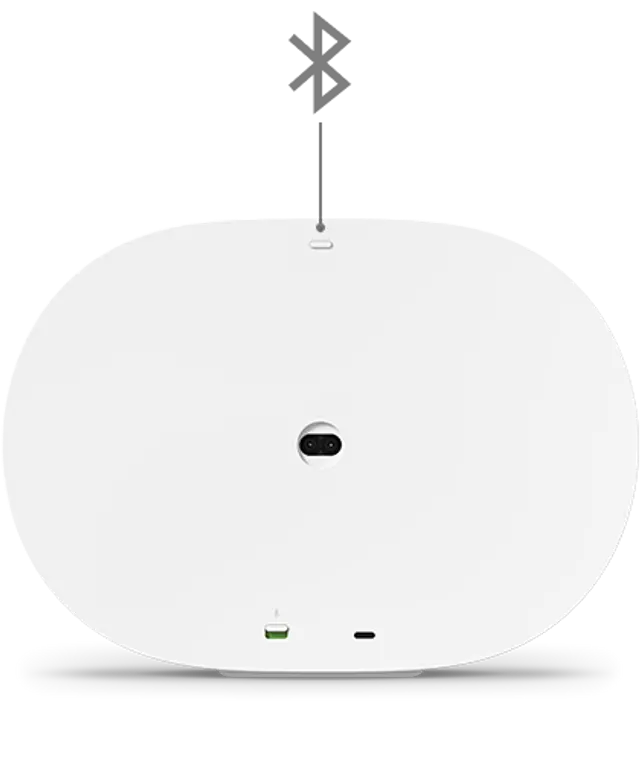
Move, Move 2, Roam, Era 100 & Era 300 (Bluetooth)
With Moves, Roam and Eras, things are a lot more simple. Hooking up these products is as easy as switching them over to Bluetooth mode, opening the Bluetooth settings of your PC and selecting them from the list, just like you would to connect a mobile device. We’ll show you how to do this in the next section.
Note that you only need pair a Sonos device to your PC once - from then on, you can use the computer to reinstate the link.
Settings:
Connecting via optical cable or Sonos Optical Audio Adapter
Once you are connected with an optical cable, you may need to perform some steps to get everything running smoothly. It would be almost impossible for us to list specific settings for every sound card or motherboard that has an optical port built in, but we can provide some basic recommendations.
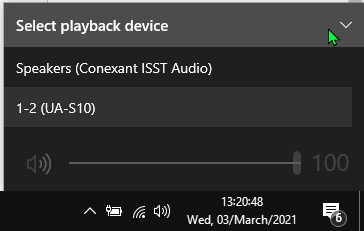
Once the optical cable is plugged in, click the speaker icon in the bottom-right corner of your Windows taskbar, then click the speaker name above the volume slider to see if an “Optical” or “Digital” sound output has shown up. If it has, just click to enable it.
If the speaker doesn’t show up there, right-click the speaker icon in the taskbar, click Open Sound Settings, Sound Control Panel and then the Playback tab.
Right-click anywhere in the list, then click “Show Disabled Devices.”
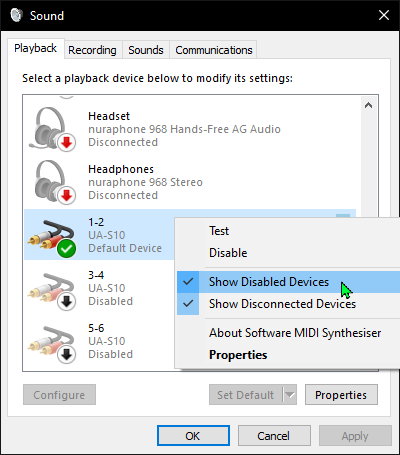
Once you’ve done that, a device named “digital output” or “optical output” should show up. Right-click it and click “Enable” to switch it on. Once you’ve done that, right-click it again and click “Set as default device.” You should now have optical audio enabled and be able to listen to your PC audio through your Sonos player. You may need to open your Sonos app and select TV from the browse menu if TV Autoplay isn’t enabled.
If this doesn’t work for you, double-check the cable is properly seated in the optical port (it should have a gentle bump or click when fully inserted), and make sure the latest drivers are installed for your sound card or motherboard’s audio processor. If all this checks out, but you’re still not seeing the options show up, get in touch with the manufacturer of your device for further assistance.
Connecting through Bluetooth
Connecting to Moves, Roam or Eras through Bluetooth is relatively quick and easy. Take a look at the GIF below to see how it’s done in Windows 10. Note: not all desktop PCs have Bluetooth built in, so you may need to use an external adapter/dongle.
On Mac, the process is also fairly straightforward. You can use the same method for connecting to Sonos through Bluetooth, or you can establish an Airplay stream to any Airplay 2 capable speakers. Check out our FAQ on Streaming Airplay audio to Sonos.
And that’s it! Once you’re connected in either of these ways you’ll be able to enjoy your PC’s audio on your Sonos player. If you’re using the cabled method you’ll be able to group other wireless players in with your PC connected device and have that audio all around your home, just be aware that the players treat the incoming signal as TV audio, so a strong connection is required between players in order to enjoy uninterrupted sound on a large group.
We love to see what our users do with our products, so if you have your Sonos set up in an interesting way with your computer we’d love to see it! Feel free to post your images in this thread ![]()
