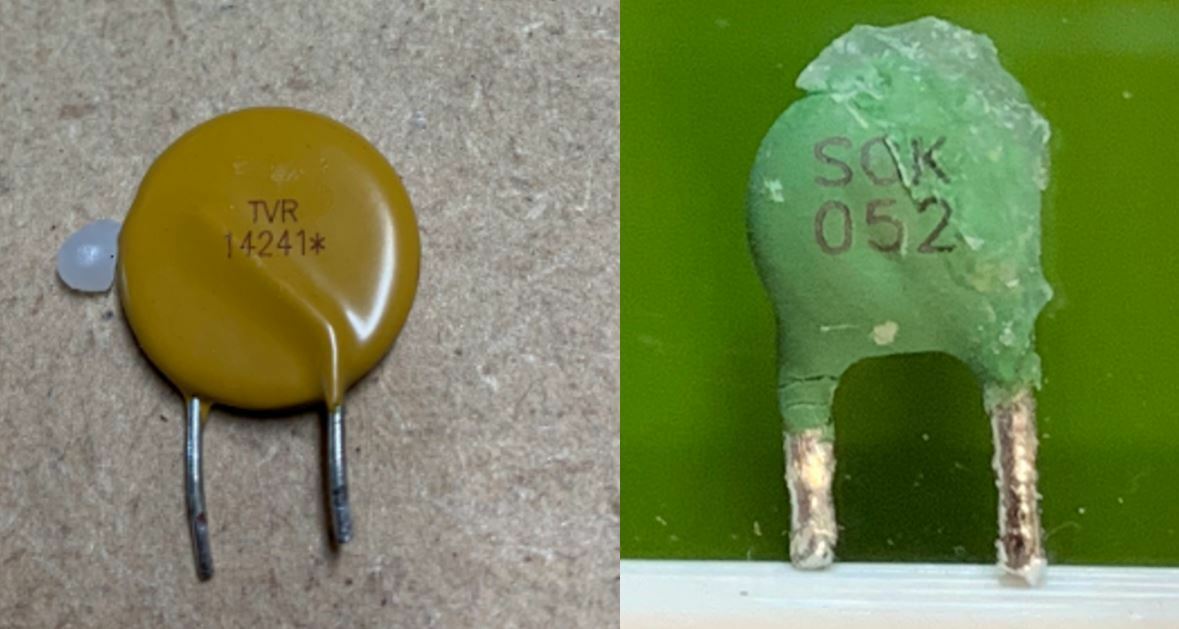
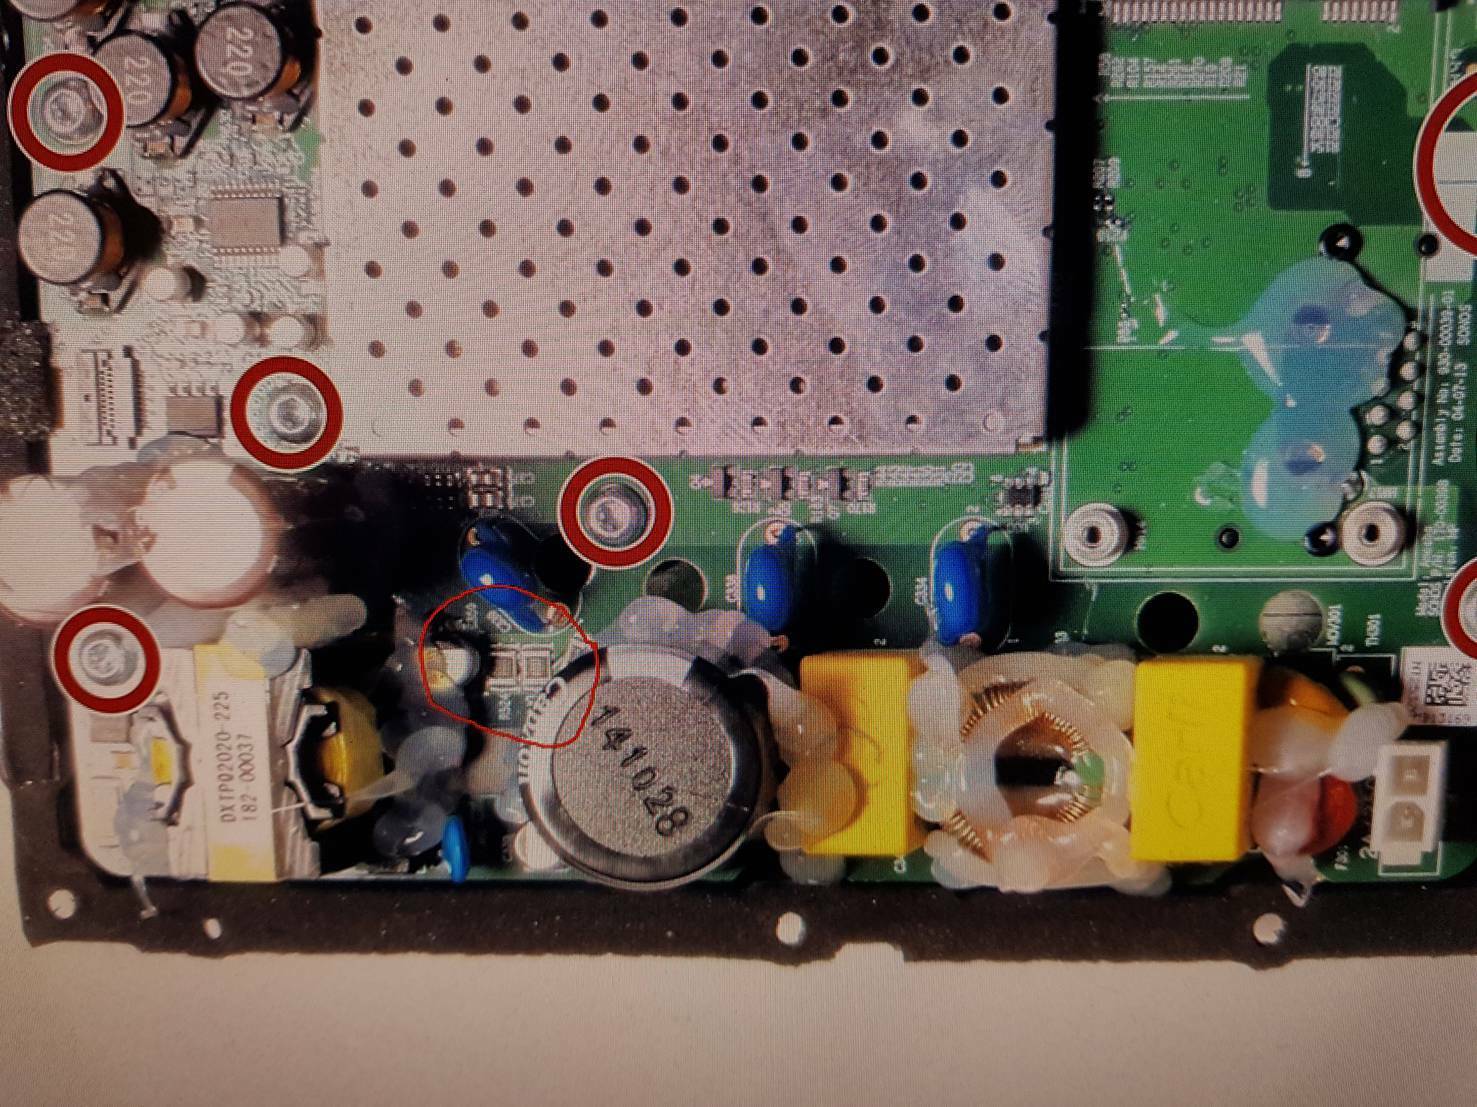
T2A Antisurge, 2A 250v Time delay, Slow blow, radial round fuse from ebay £1.39 for 3... slightly cheaper than then £109 sonos wanted.
Did you find a transformer for the play 1
Any idea of the winding and output voltages ?
I had mine go bad and short circuit to ground
So I removed it and moded the play one with an external 24v dc supply attached to the caps on the bottom of the board
Not the best but it’s only until I can source a transformer ?
Following a problem in my electrical installation, my play 1 received 400V instead of 220V => it's doesn't work anymore.
I open it and find that the fuse is died => no problem to replace it but I have also 2 other components to replace but not possible to knows the value and the type of component.
Can some one can help me?
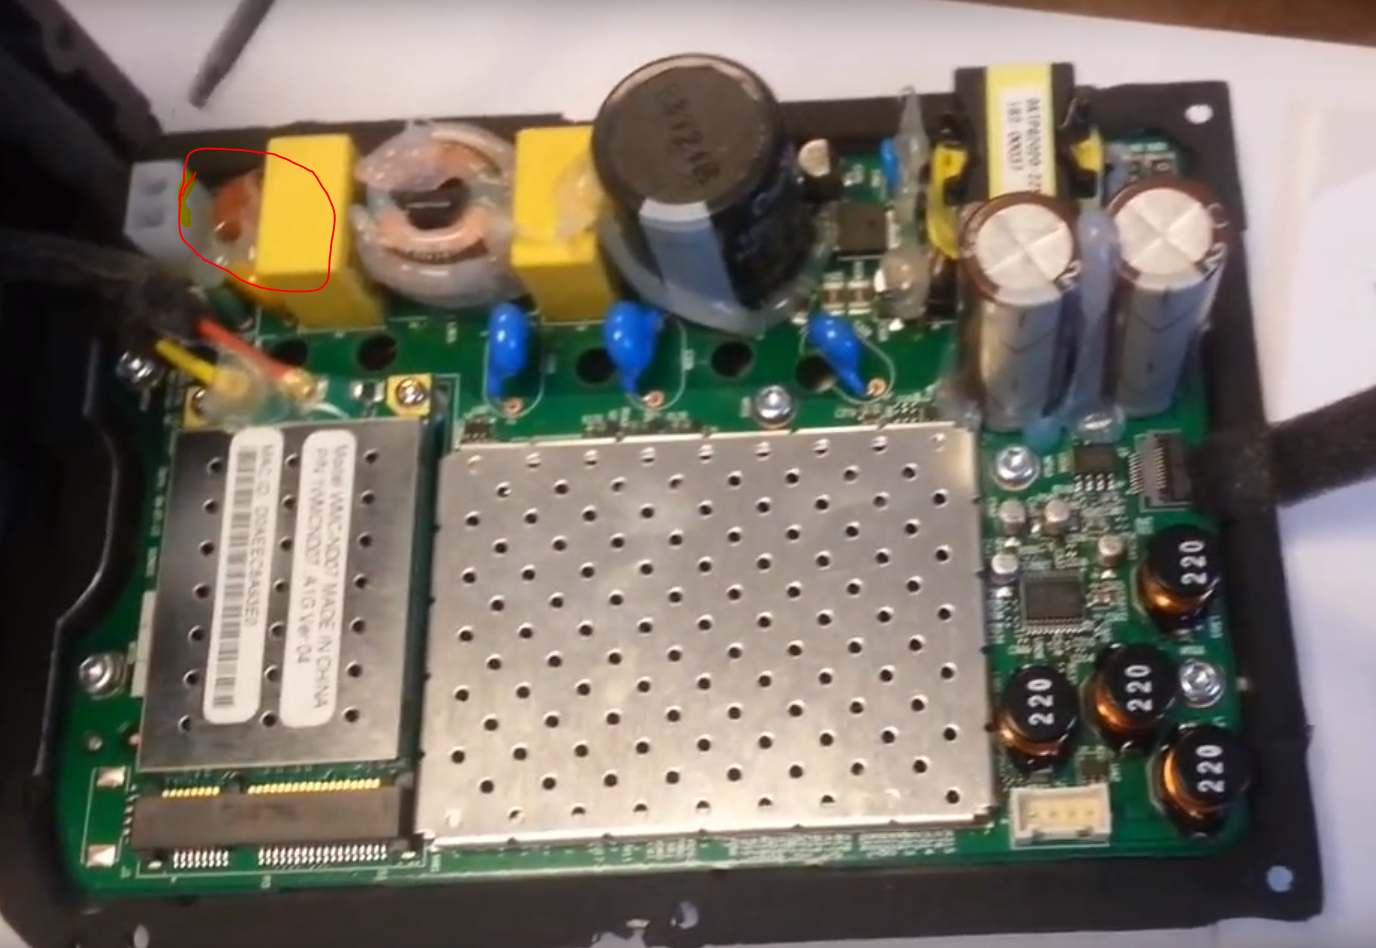
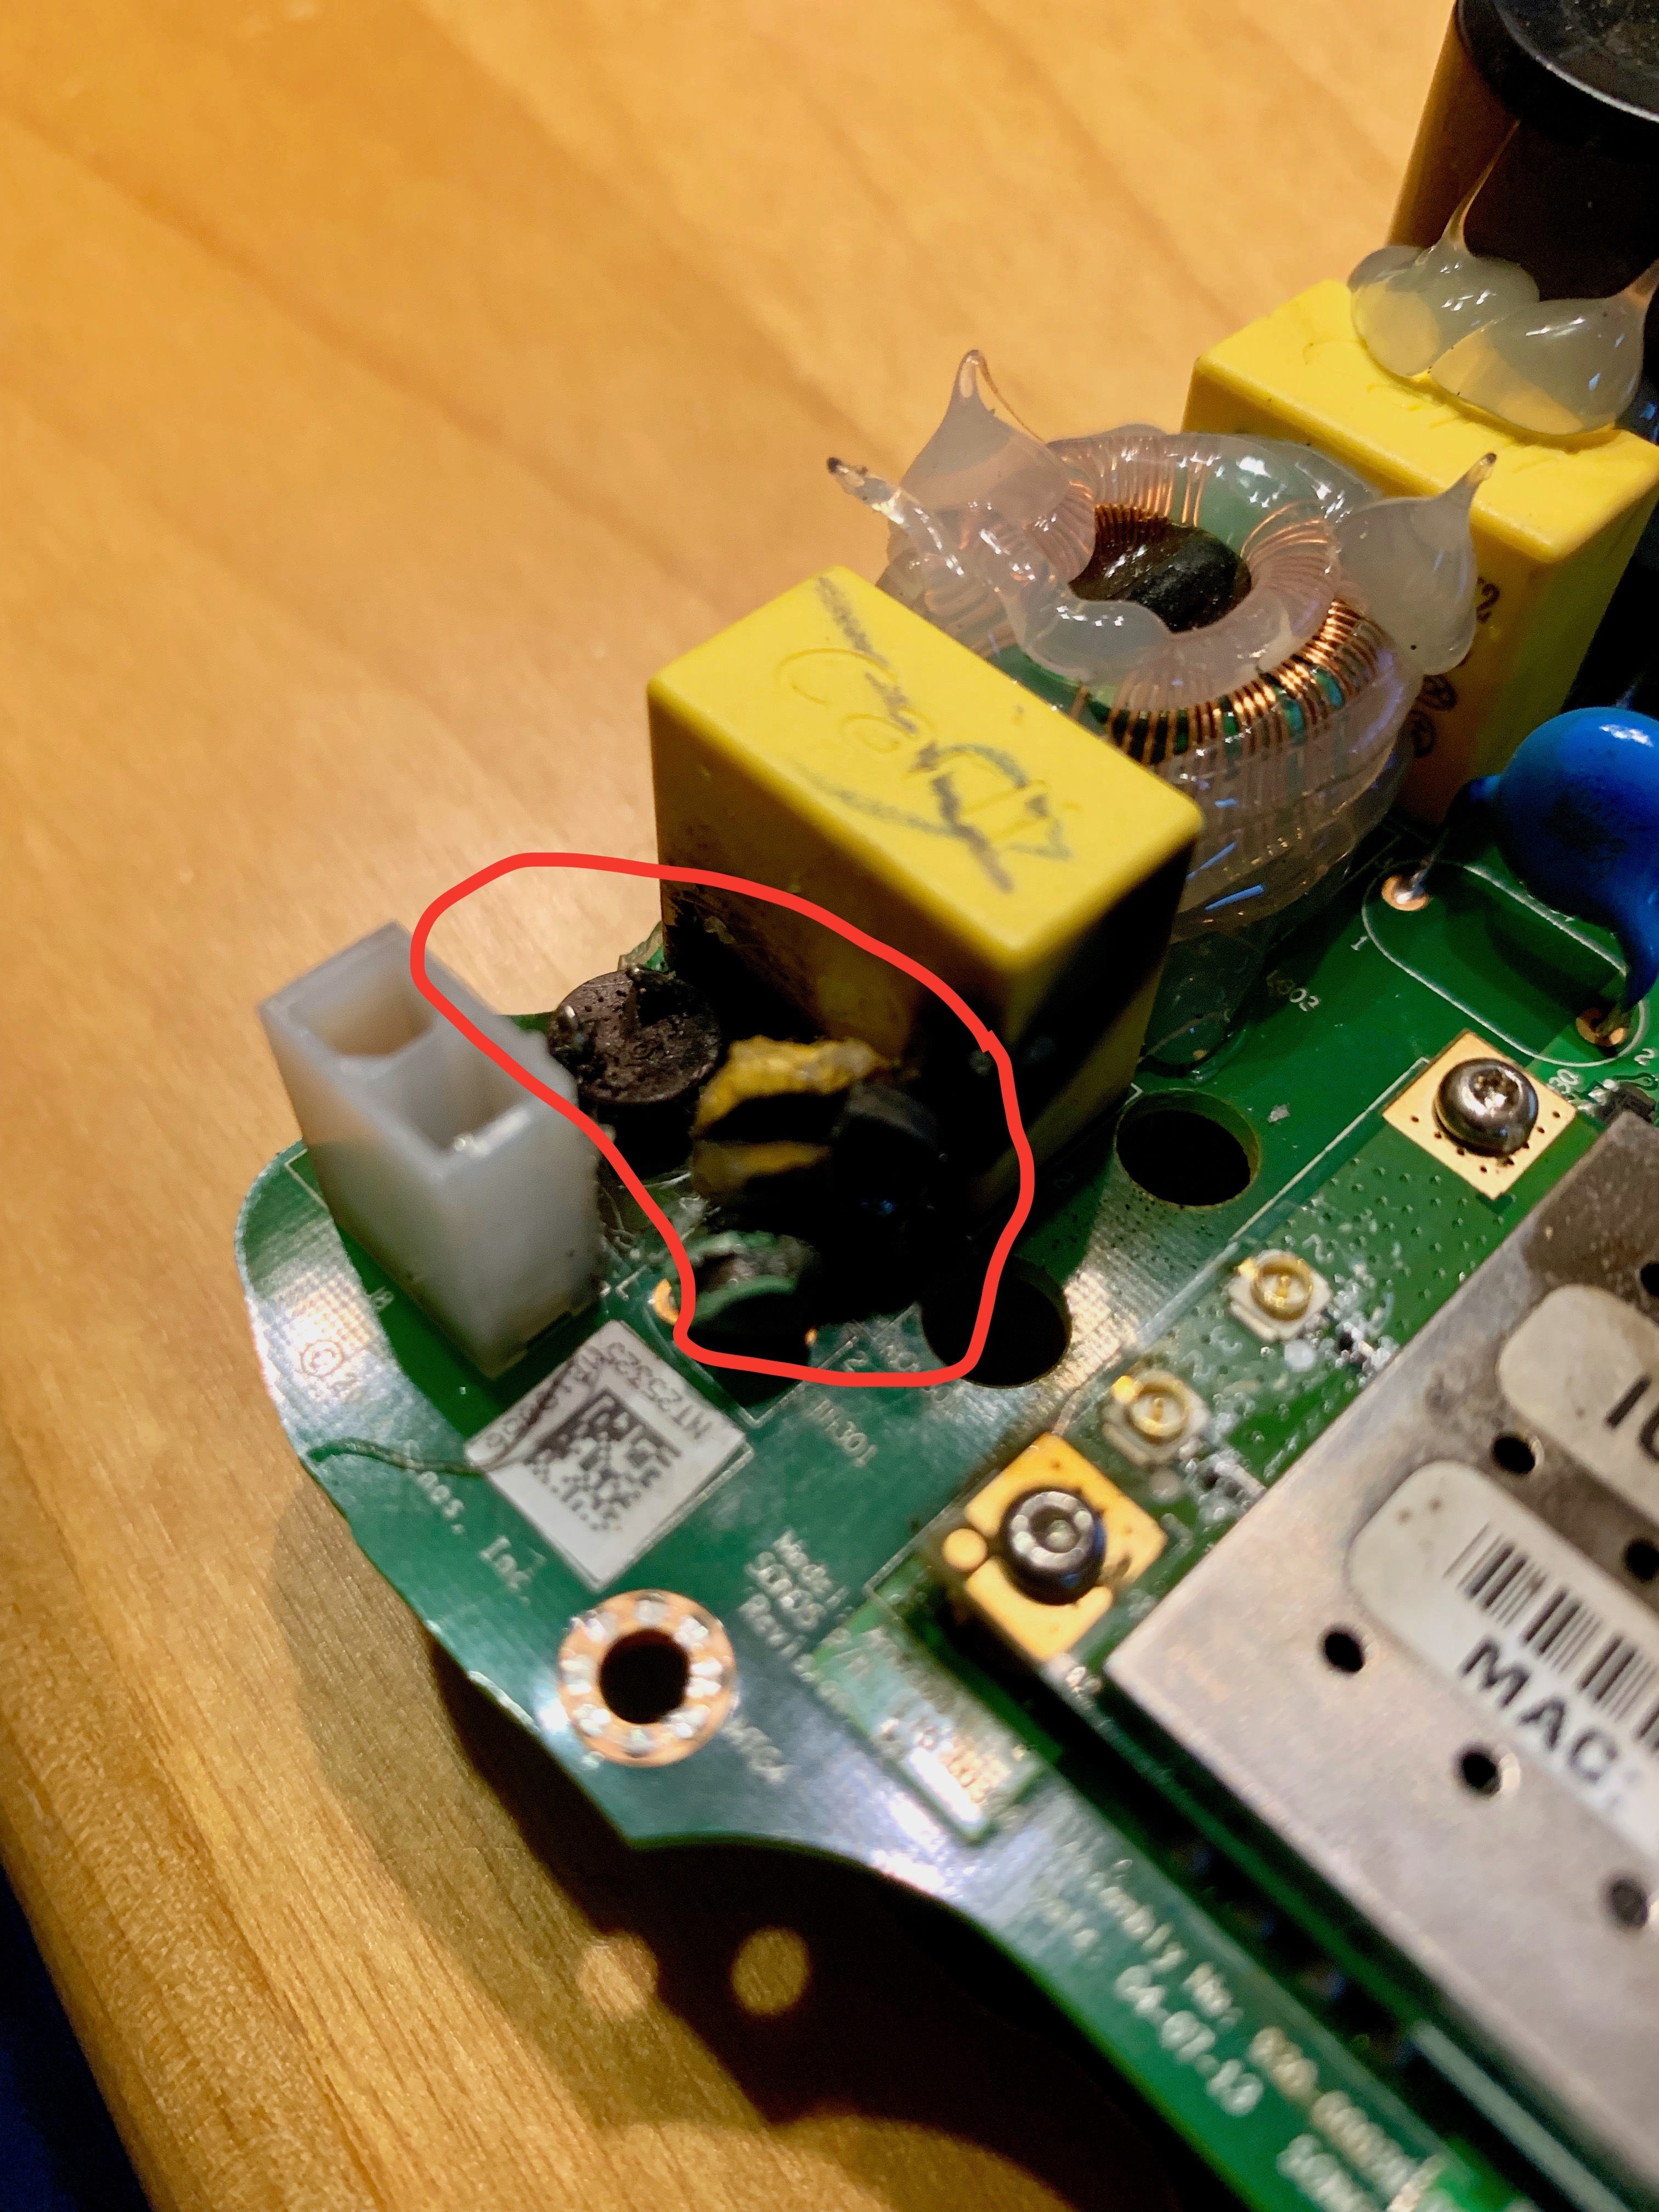
Component number TH301 and MOV301 see picture.
Thanks in advance
Regards
Please be advised that Sonos will not honour any claims (both in-warranty and out-of-warranty), for devices that are tampered with. Opening your device(s) will void any eligibility for replacement of your device(s), for claims both free of charge and those for a fee.
My play1 is not anymore under warranty => my only solution is to repair myself because I'm sure Sonos will not repair it for a correct price.
It's too late now, but Sonos may have offered you a replacement unit for a small fee.
After checking the above fuse on the main board, I found that it had blown. replaced and unit now working. ifixit shows how to pull it apart. easy fix. not sure if its a common issue. Regards
But not yet any equivalents for sale on a website.
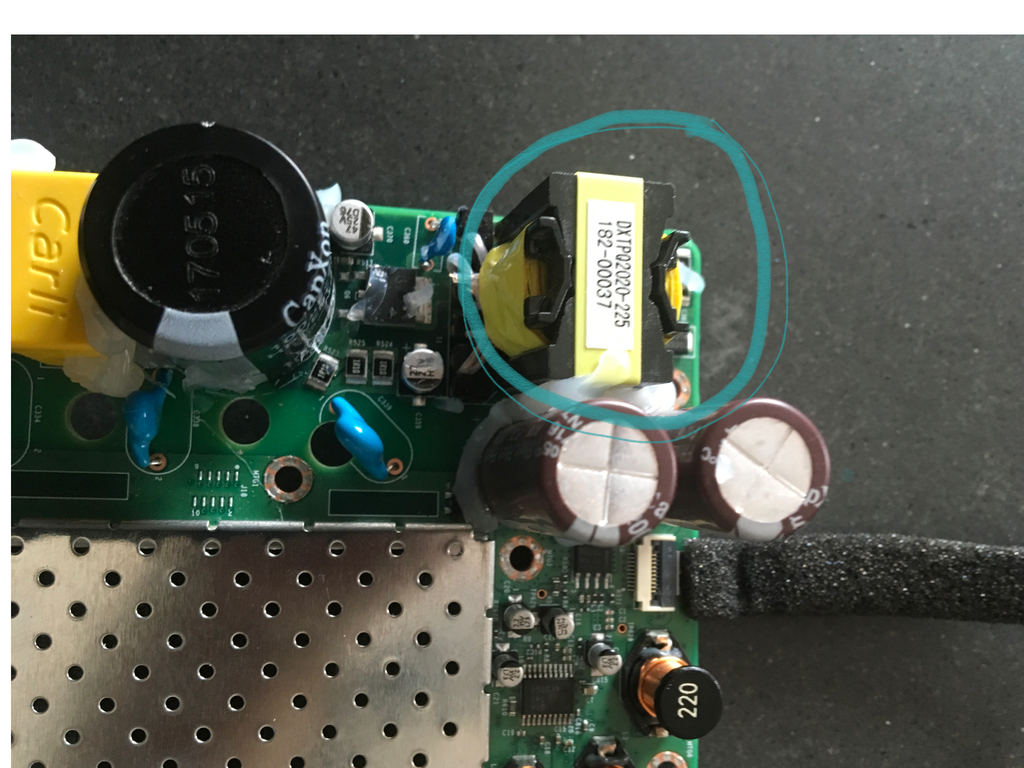
DXTPQ2020-225, didnt find any parts info for replacement, any idea ?
Thanks
I have a dead Play1, and I think the transformer may be bad. How did you determine that yours was broken?
I find about 155VDC on the primary (yes, DC - I presume that when it's working, it is cycled via the opto-isolator), but 0V on the secondary side. I don't have continuity across the primary coil, which is why I think I have a problem transformer.
Did anyone ever find a replacement?
I guess that I can take apart another (working) Play1, and try to determine the characteristics of the transformer, but that's not ideal for obvious reasons.
Thanks,
Tim
It doesn't exist. There are no authorized repair services -- the only 'sanctioned' way to get a device repaired is to return it to Sonos. As a result, Sonos has never provided any repair guides or parts lists.
DXTPQ2020-225, didnt find any parts info for replacement, any idea ?
Thanks
I have a dead Play1, and I think the transformer may be bad. How did you determine that yours was broken?
I find about 155VDC on the primary (yes, DC - I presume that when it's working, it is cycled via the opto-isolator), but 0V on the secondary side. I don't have continuity across the primary coil, which is why I think I have a problem transformer.
Did anyone ever find a replacement?
I guess that I can take apart another (working) Play1, and try to determine the characteristics of the transformer, but that's not ideal for obvious reasons.
Thanks,
Tim
I FIXED my dead play1. :D
I removed the bad transformer. From a good play1, I determined that the transformer was converting 155 VIN to (I think) 18V, which was then converted to 24VDC on the board. There are hundreds of transformers on mouser, but rather than try to find a replacement and then wedge that into the space, I went another route. Using my bench power supply, I was able to feed 24VDC in to the board and everything worked. I measured a peak draw of about 350mA, which works out to about 8 watts. I then purchased an AC/DC power module. This was mouser part 709-30-24ST (they also have 709-30-24, but that has pins instead of screw terminals). It was a mean-well IRM-30-24ST "ac/dc power module 31.2WQ 24V 1.3A Screw terminal style". I chose a 30W unit just to be safe. You may be able to use a smaller rated unit, but I figured that this would fit the space, and it was pretty inexpensive (about $15USD).
By feeding connecting the inputs of this to the 155V pins from the transformer primary side (the outermost 2 of the 6 provided on the board), and connecting the 24VDC output to the two 24V storage capacitors, the device worked great. My next challenge was to get it all back into the enclosure. I was able to gently bend the speaker terminals out of the way, and put the module right behind the tweeter. However, the two tall storage capacitors needed to be moved to allow me to put the control board back in place. I removed them and laid them flat against the board. I taped in place with tuck tape (which is very tolerant of temperature swings and does not dry out). I wired the capacitors in series and reconnected them to one of the formerly occupied pairs of through holes. I then wired the 24VDC module output to the other pair of through holes. I also included several layers of foam insulation to make sure that there would be no vibrations caused from within the enclosure due to vibration of either then new module or the repositioned capacitors.
It's been running for a week with no issues. Some pictures are attached.
I hope that this helps others with similar problems!
I’m not shure, but I guess the failure had something to do with the fact that for 4½ years, I always powered it off by a single pole switch, when not listening to it. Maybe power peaks at each startup wore out the TH301.
And MOV301 didn’t look very well neither.
After replacing both of them, my Play:1 works well again, and stays much cooler at the back side.
Does anybody knows a source for spare parts? Or, maybe has such parts for sale? Ebay has been no luck for quite some time...
Thank you!
Anyone knows what the components are?
Best regards
Patrick
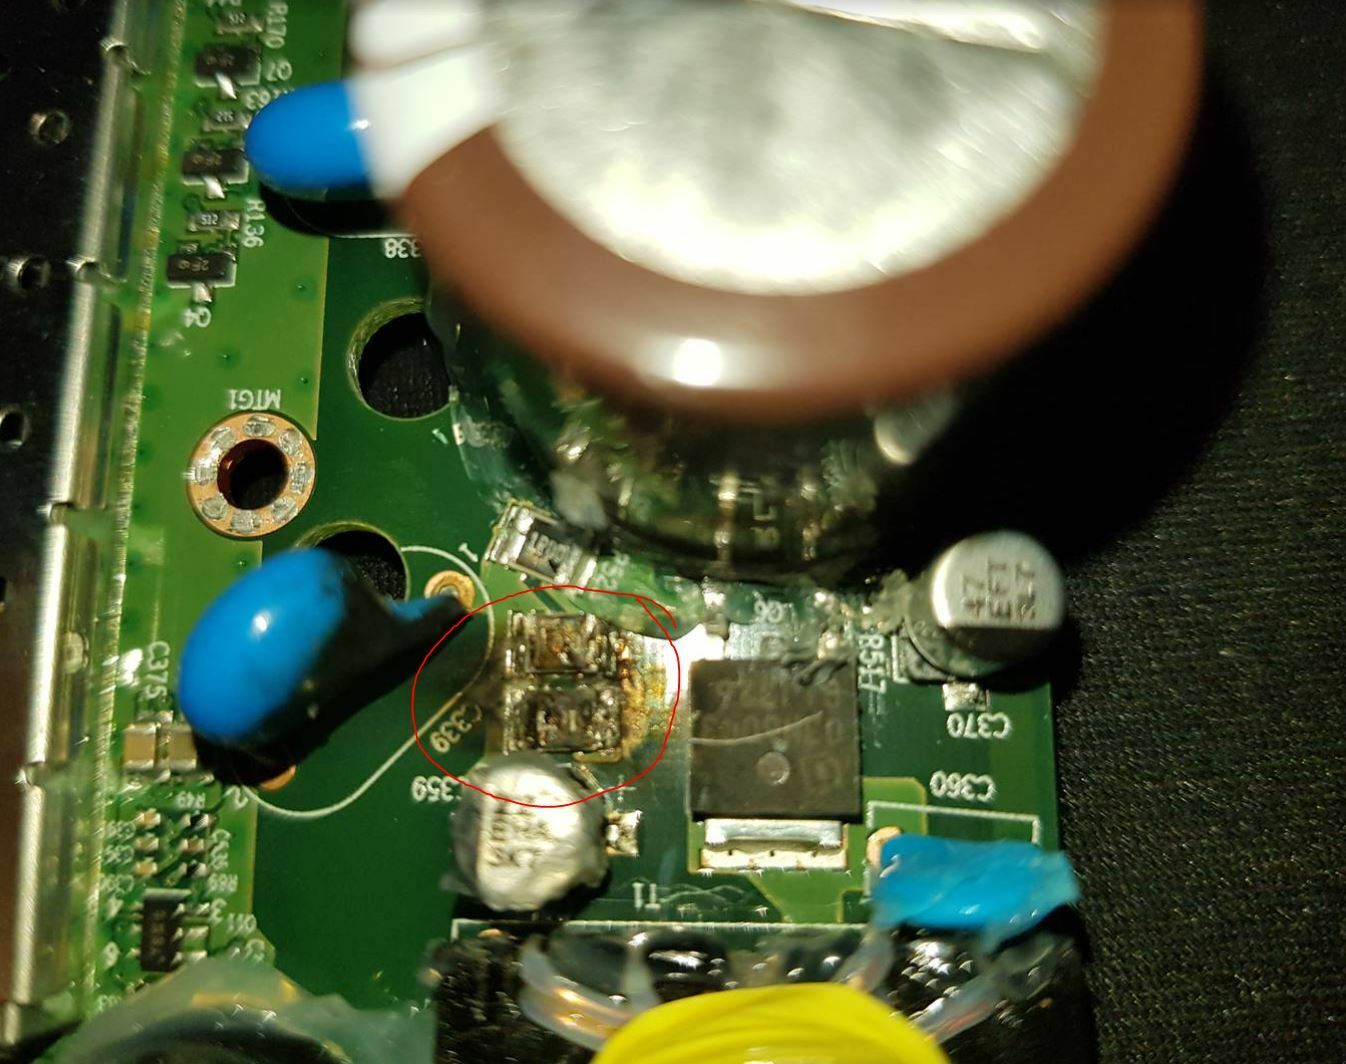
I have just opened I to find the same problem. The 2 burnt components in Lazarov’s pics are 1 Ohm 1/2w 1% 1206 smd resistors, (here’s another just above them)
You will also find the black square component next to them (Q6) is a SPD03N60C3BTMA1N 3.2A 650V MosFet which will be shorted, also check R517 resistor next to the right hand leg should be 100R resistor which comes from pin 8 (Gate Drive)of the IC on the bottom side marked 6751MR (FAN6751MR), the bridge rectifier DF1506S-T (1.5A 650V) and lastly the fuse near the AC i/p connector (2A 152V)
hope this helps
hi, thanks for the info on play 1 pcb, do you know what type of diode D302 is as it seems also to have gone short,
any help appreciated
stuart
Disclaimer:
Please be advised that Sonos will not honour any claims (both in-warranty and out-of-warranty), for devices that are tampered with. Opening your device(s) will void any eligibility for replacement of your device(s), for claims both free of charge and those for a fee.
please be advised Sonos is unwilling to consider repairing parts that knowingly fail, such as the motherboards. While it can be fixed for a few bucks, the BEST Sonos will do is ask you to send back the speaker and give you a 30% discount on the same product, WHICH MAY OR MAY NOT BE a refurbished product. This is a great business model for Sonos, and completely unfair for the consumer, hence the bad reputation that is starting to swell within the Sonos community. I can rely on Sonos for building a good interface and speaker, but can’t think of a poorer customer service experience. My speaker could be repaired for a few dollars, yet their best offer is a replacement for 30% off the original price. It’s silly.
I know this is an old thread, but it was a great source of information when troubleshooting and fixing a Play 1, so I just want to add my solution for anyone else who ends up here.
Disclaimer: I bought this unit very cheap knowing that it didn’t power up and it’s well outside of its warranty. Opening your unit will invalidate your warranty if you still have one and Sonos won’t help you with it in anyway thereafter. Open and fix at your own risk.
I believe my Play 1 had the same failure as OP’s. The transformer appears to have failed. From testing I think one primary winding is shorted and the other is open. It also appears that when it failed it took the Bridge Rectifier with it, as well as who knows how many other components. After swapping several components out for new ones and going through multiple 2A fuses (the red on board cylinder ones) I conceded that the transformer was the root cause but that it was near-impossible to find the correct replacement. As
I opted for a similar course of action to
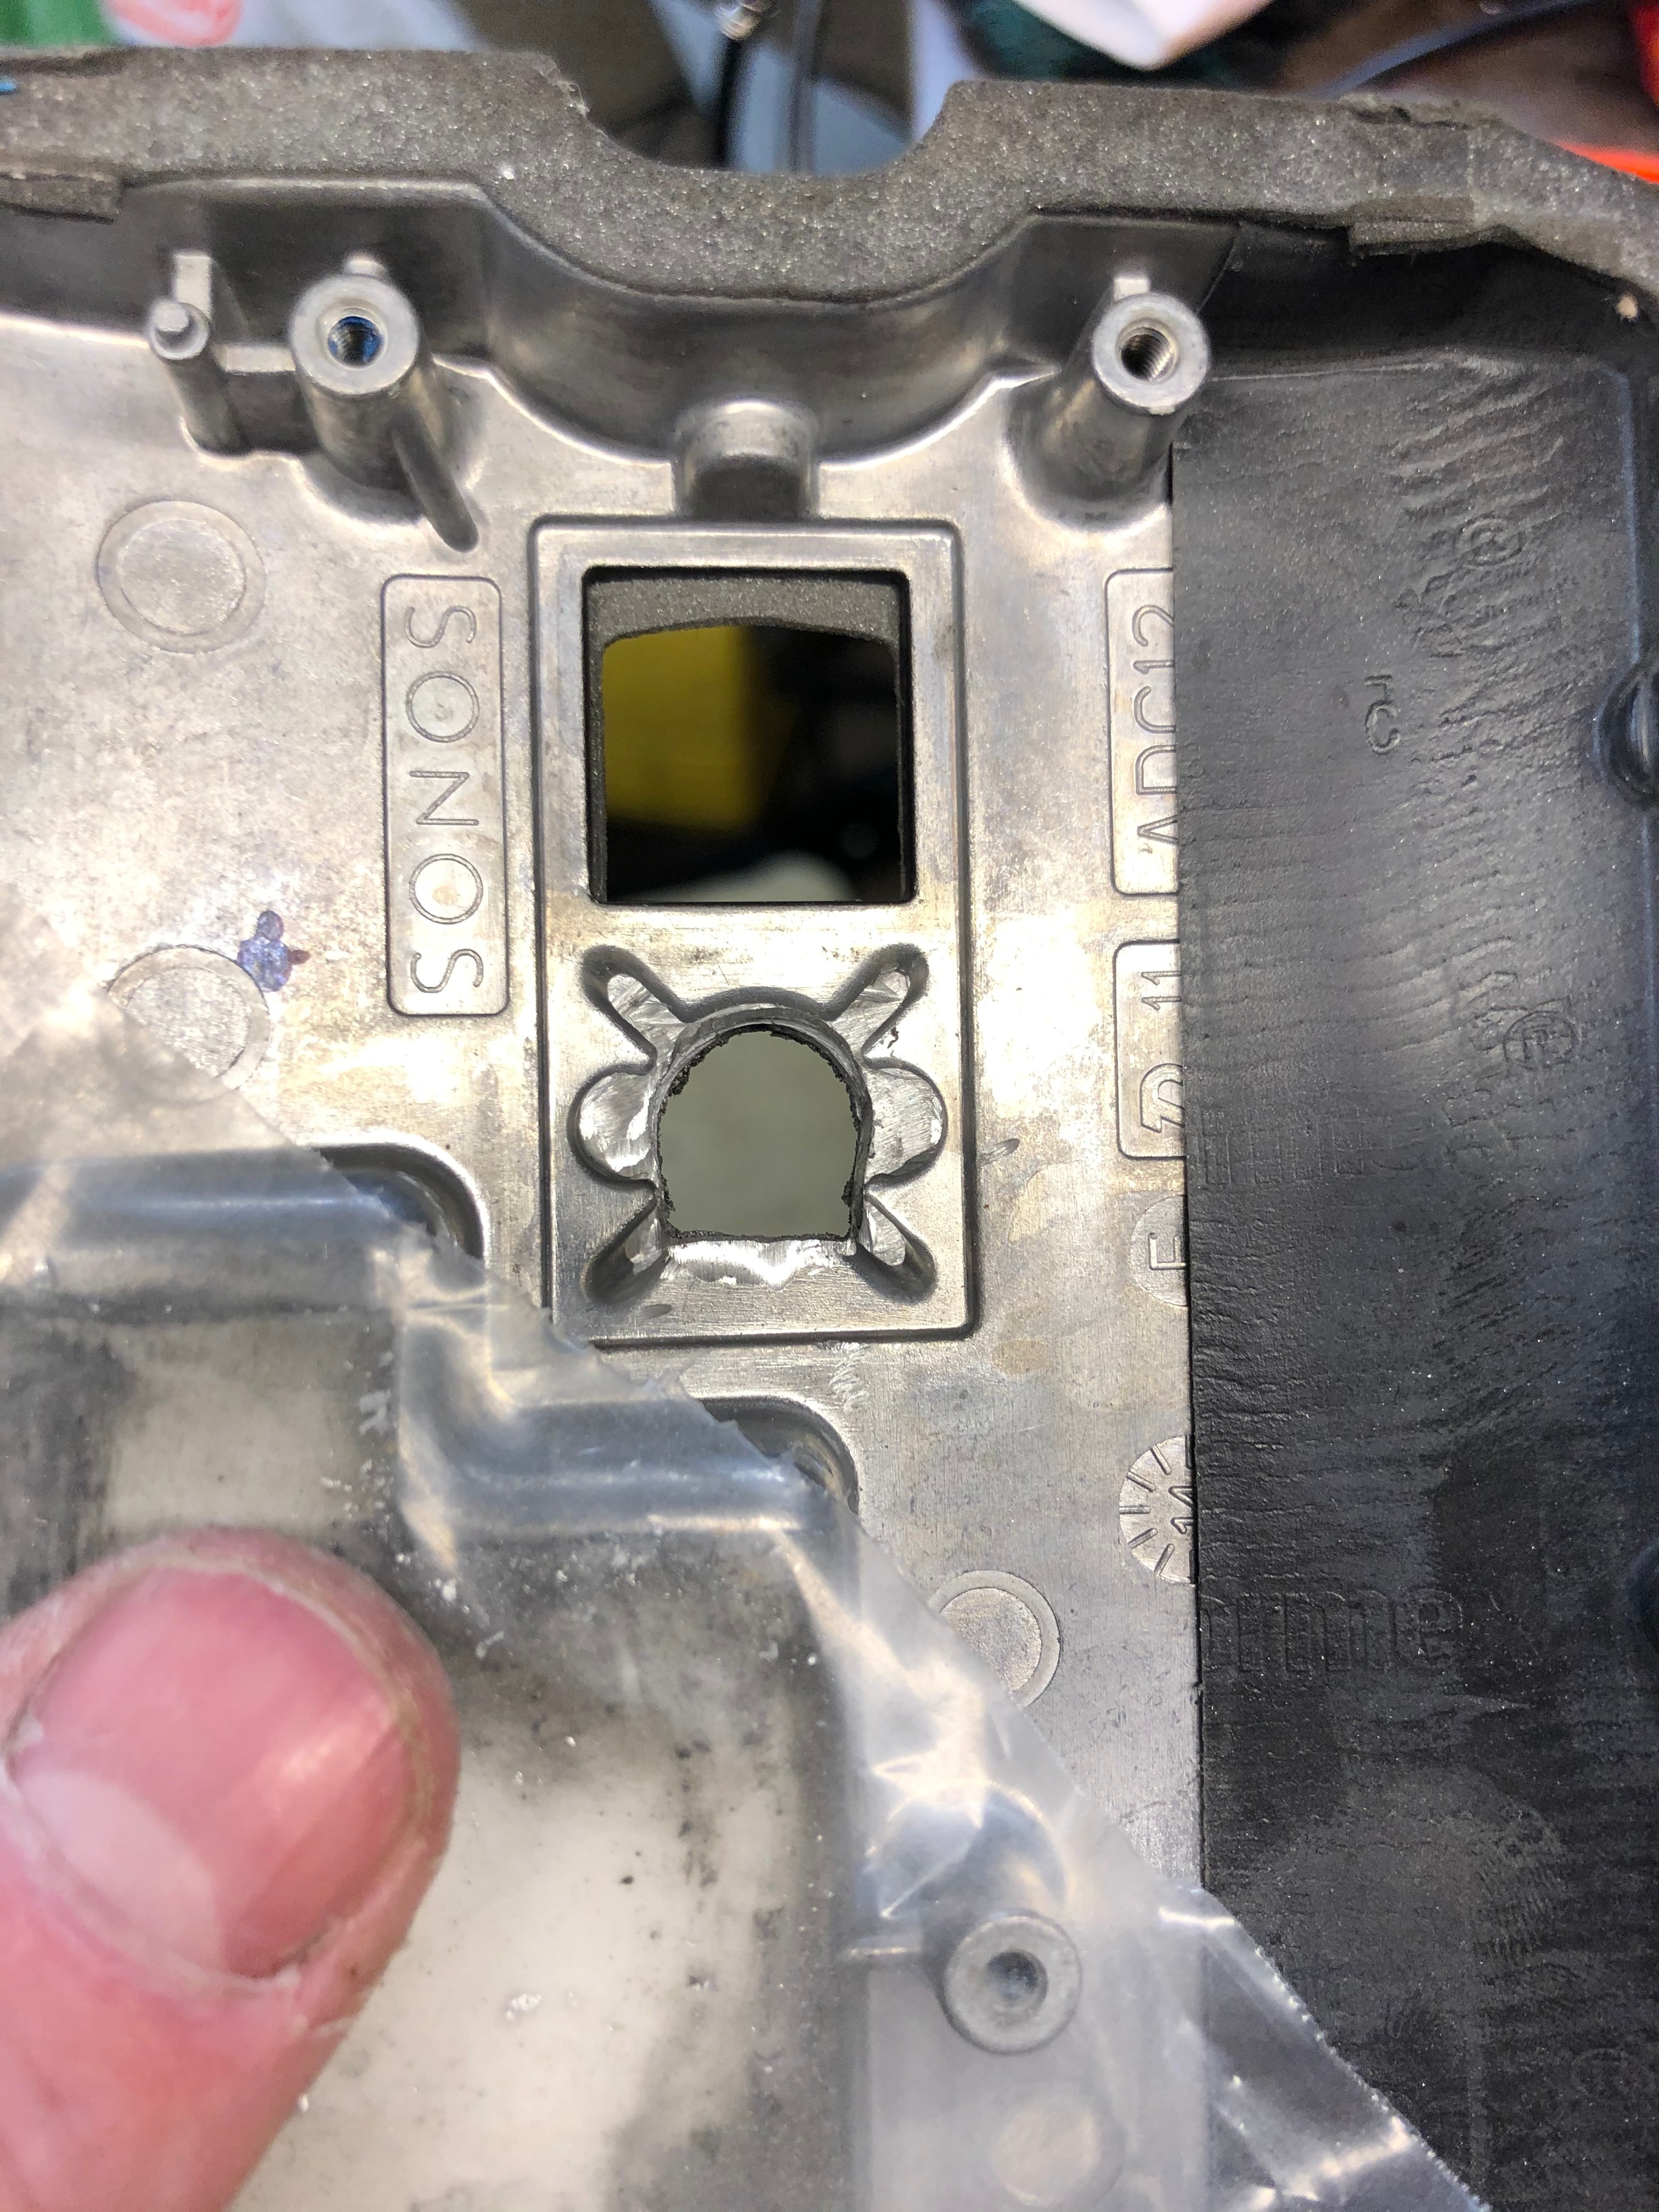
I tried to cover the heat sink adhesive with plastic to stop metal dust sticking, but this failed. Managed to scrape most of it off. I should have just peeled it off and stuck back on after.
Connected leads from the socket to the 35v rated storage capacitors. Ignore the large mess of wires connected to the bridge rectifier on the right of the image. This was part of my earlier testing and was removed after this photo.
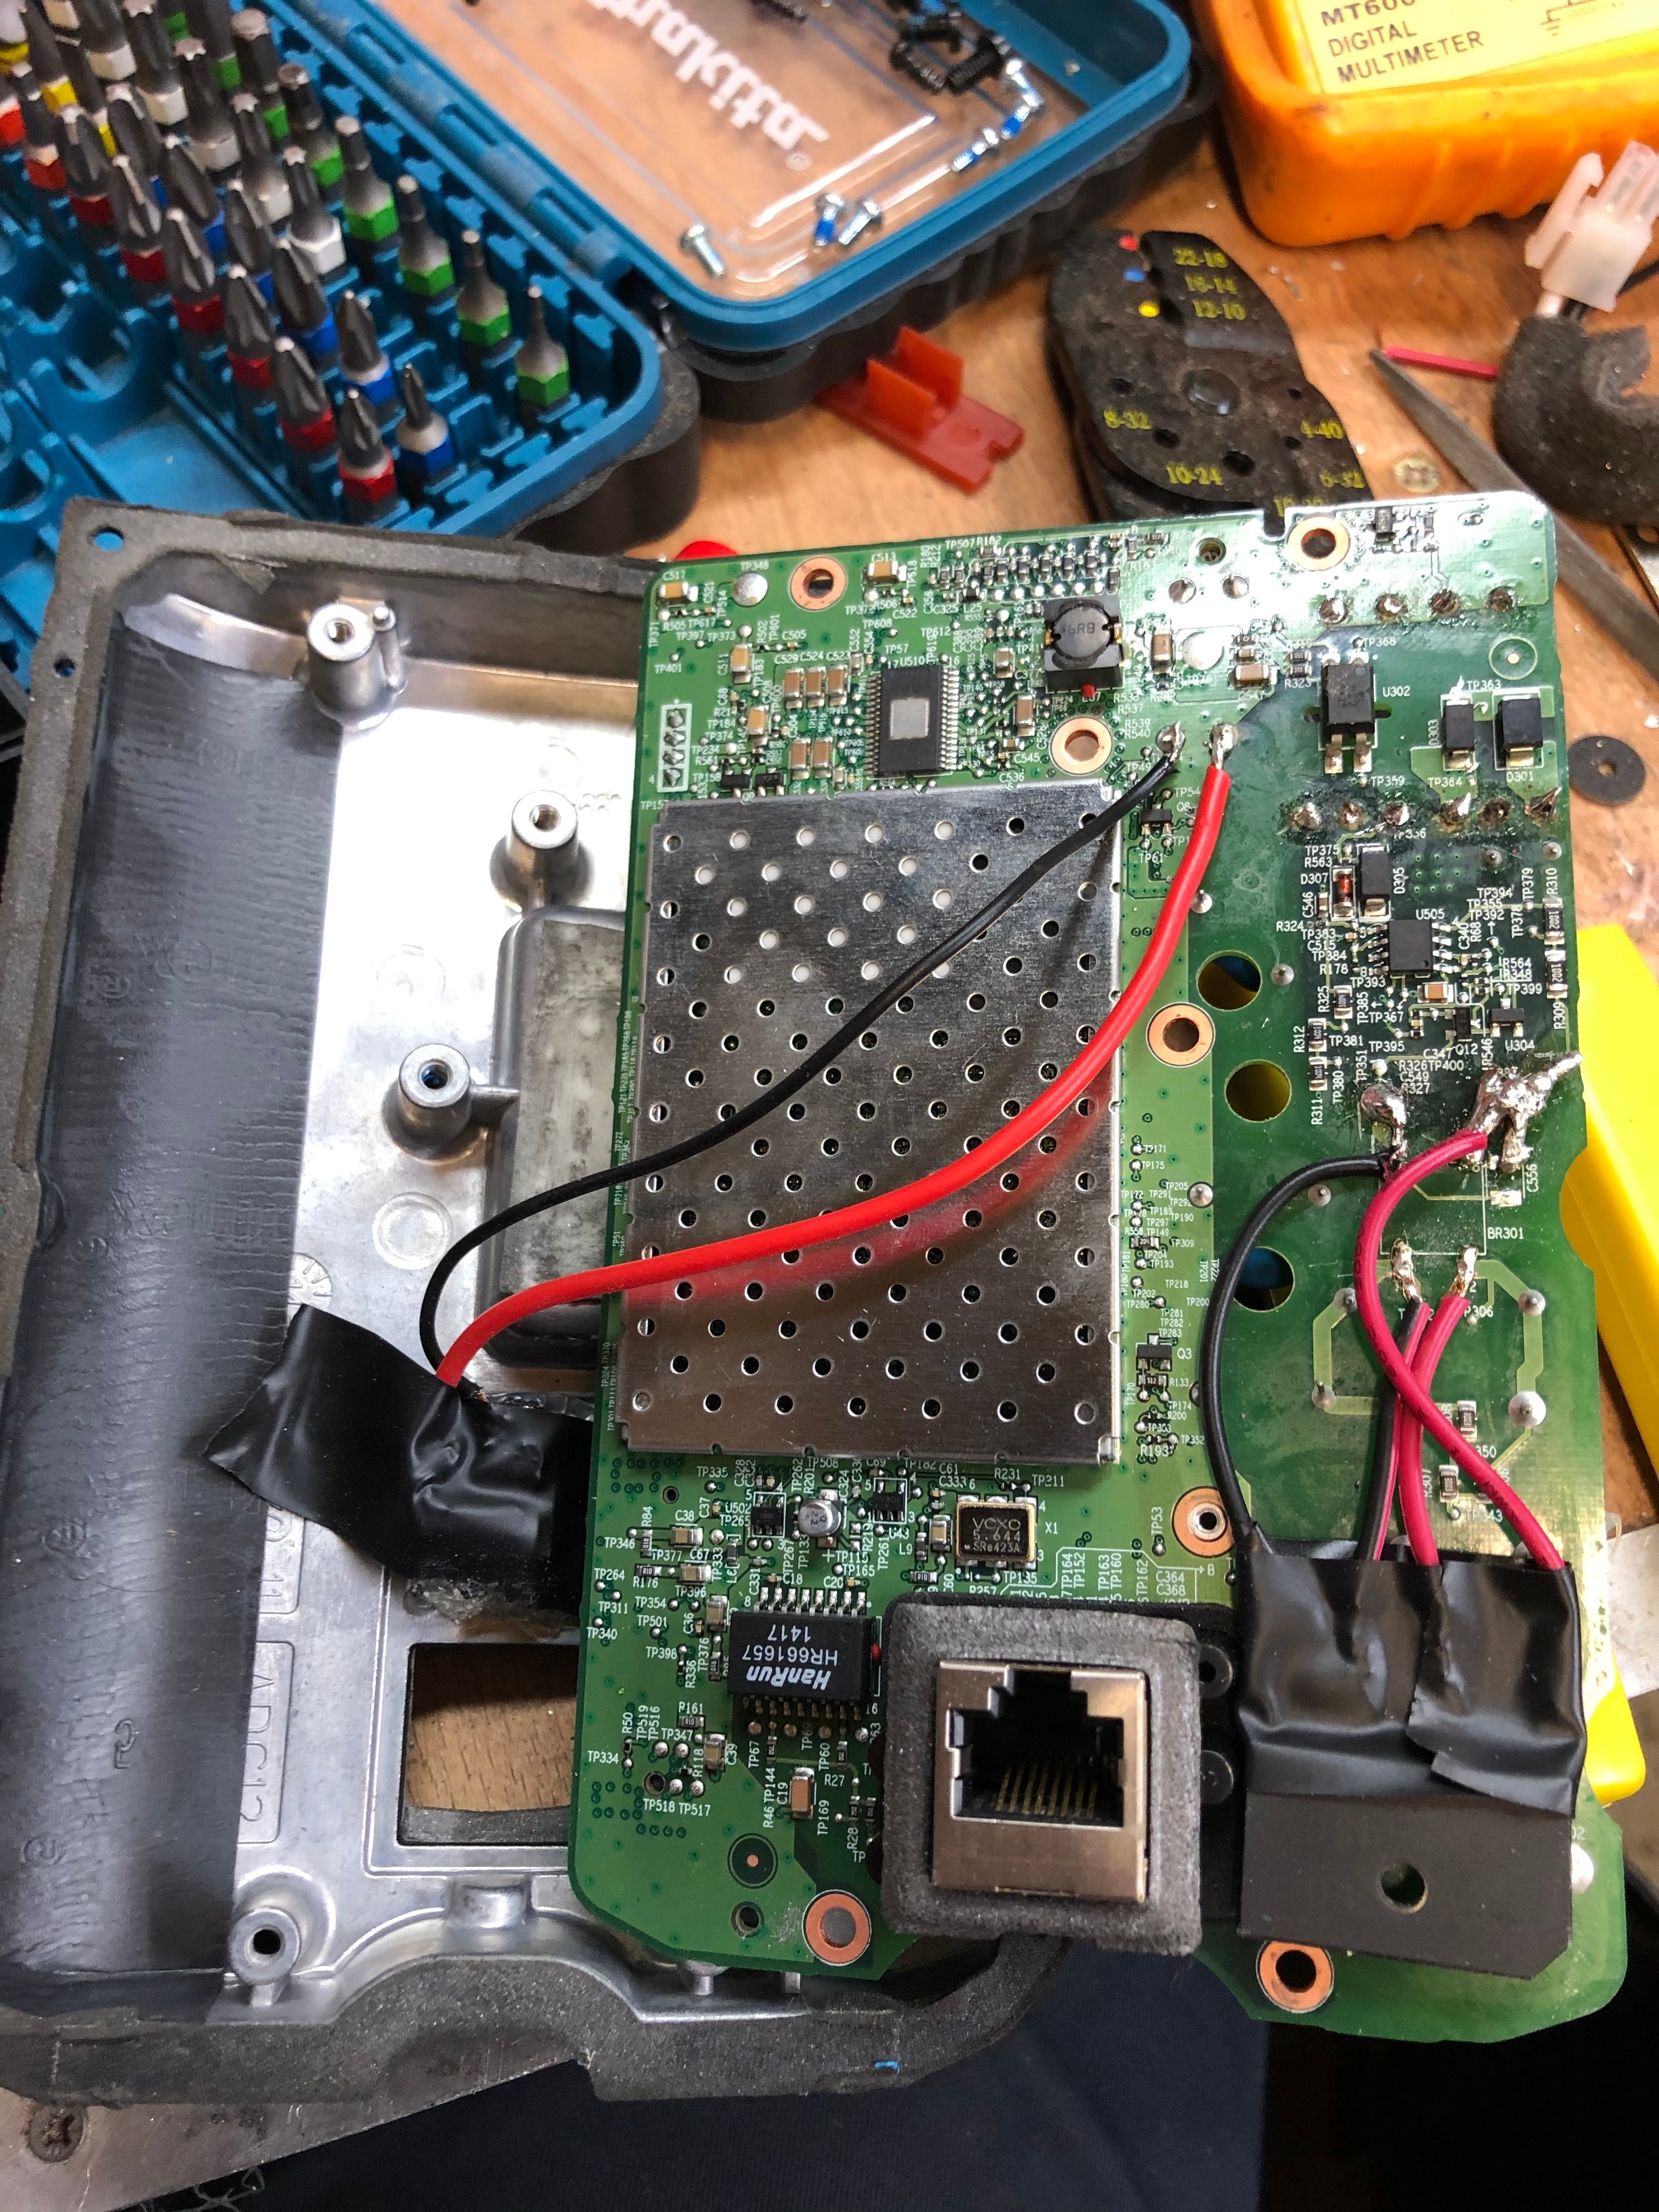
I initially secured the socket in place with lots of hot glue as per Sonos’ own construction protocols (seriously, the hot glue guy in their factory either needs a pay rise or some therapy). This didn’t hold very well and so I replaced it with a whole lot of two part epoxy resin.
Re-assembled the device and the new power socket is very nicely disguised.
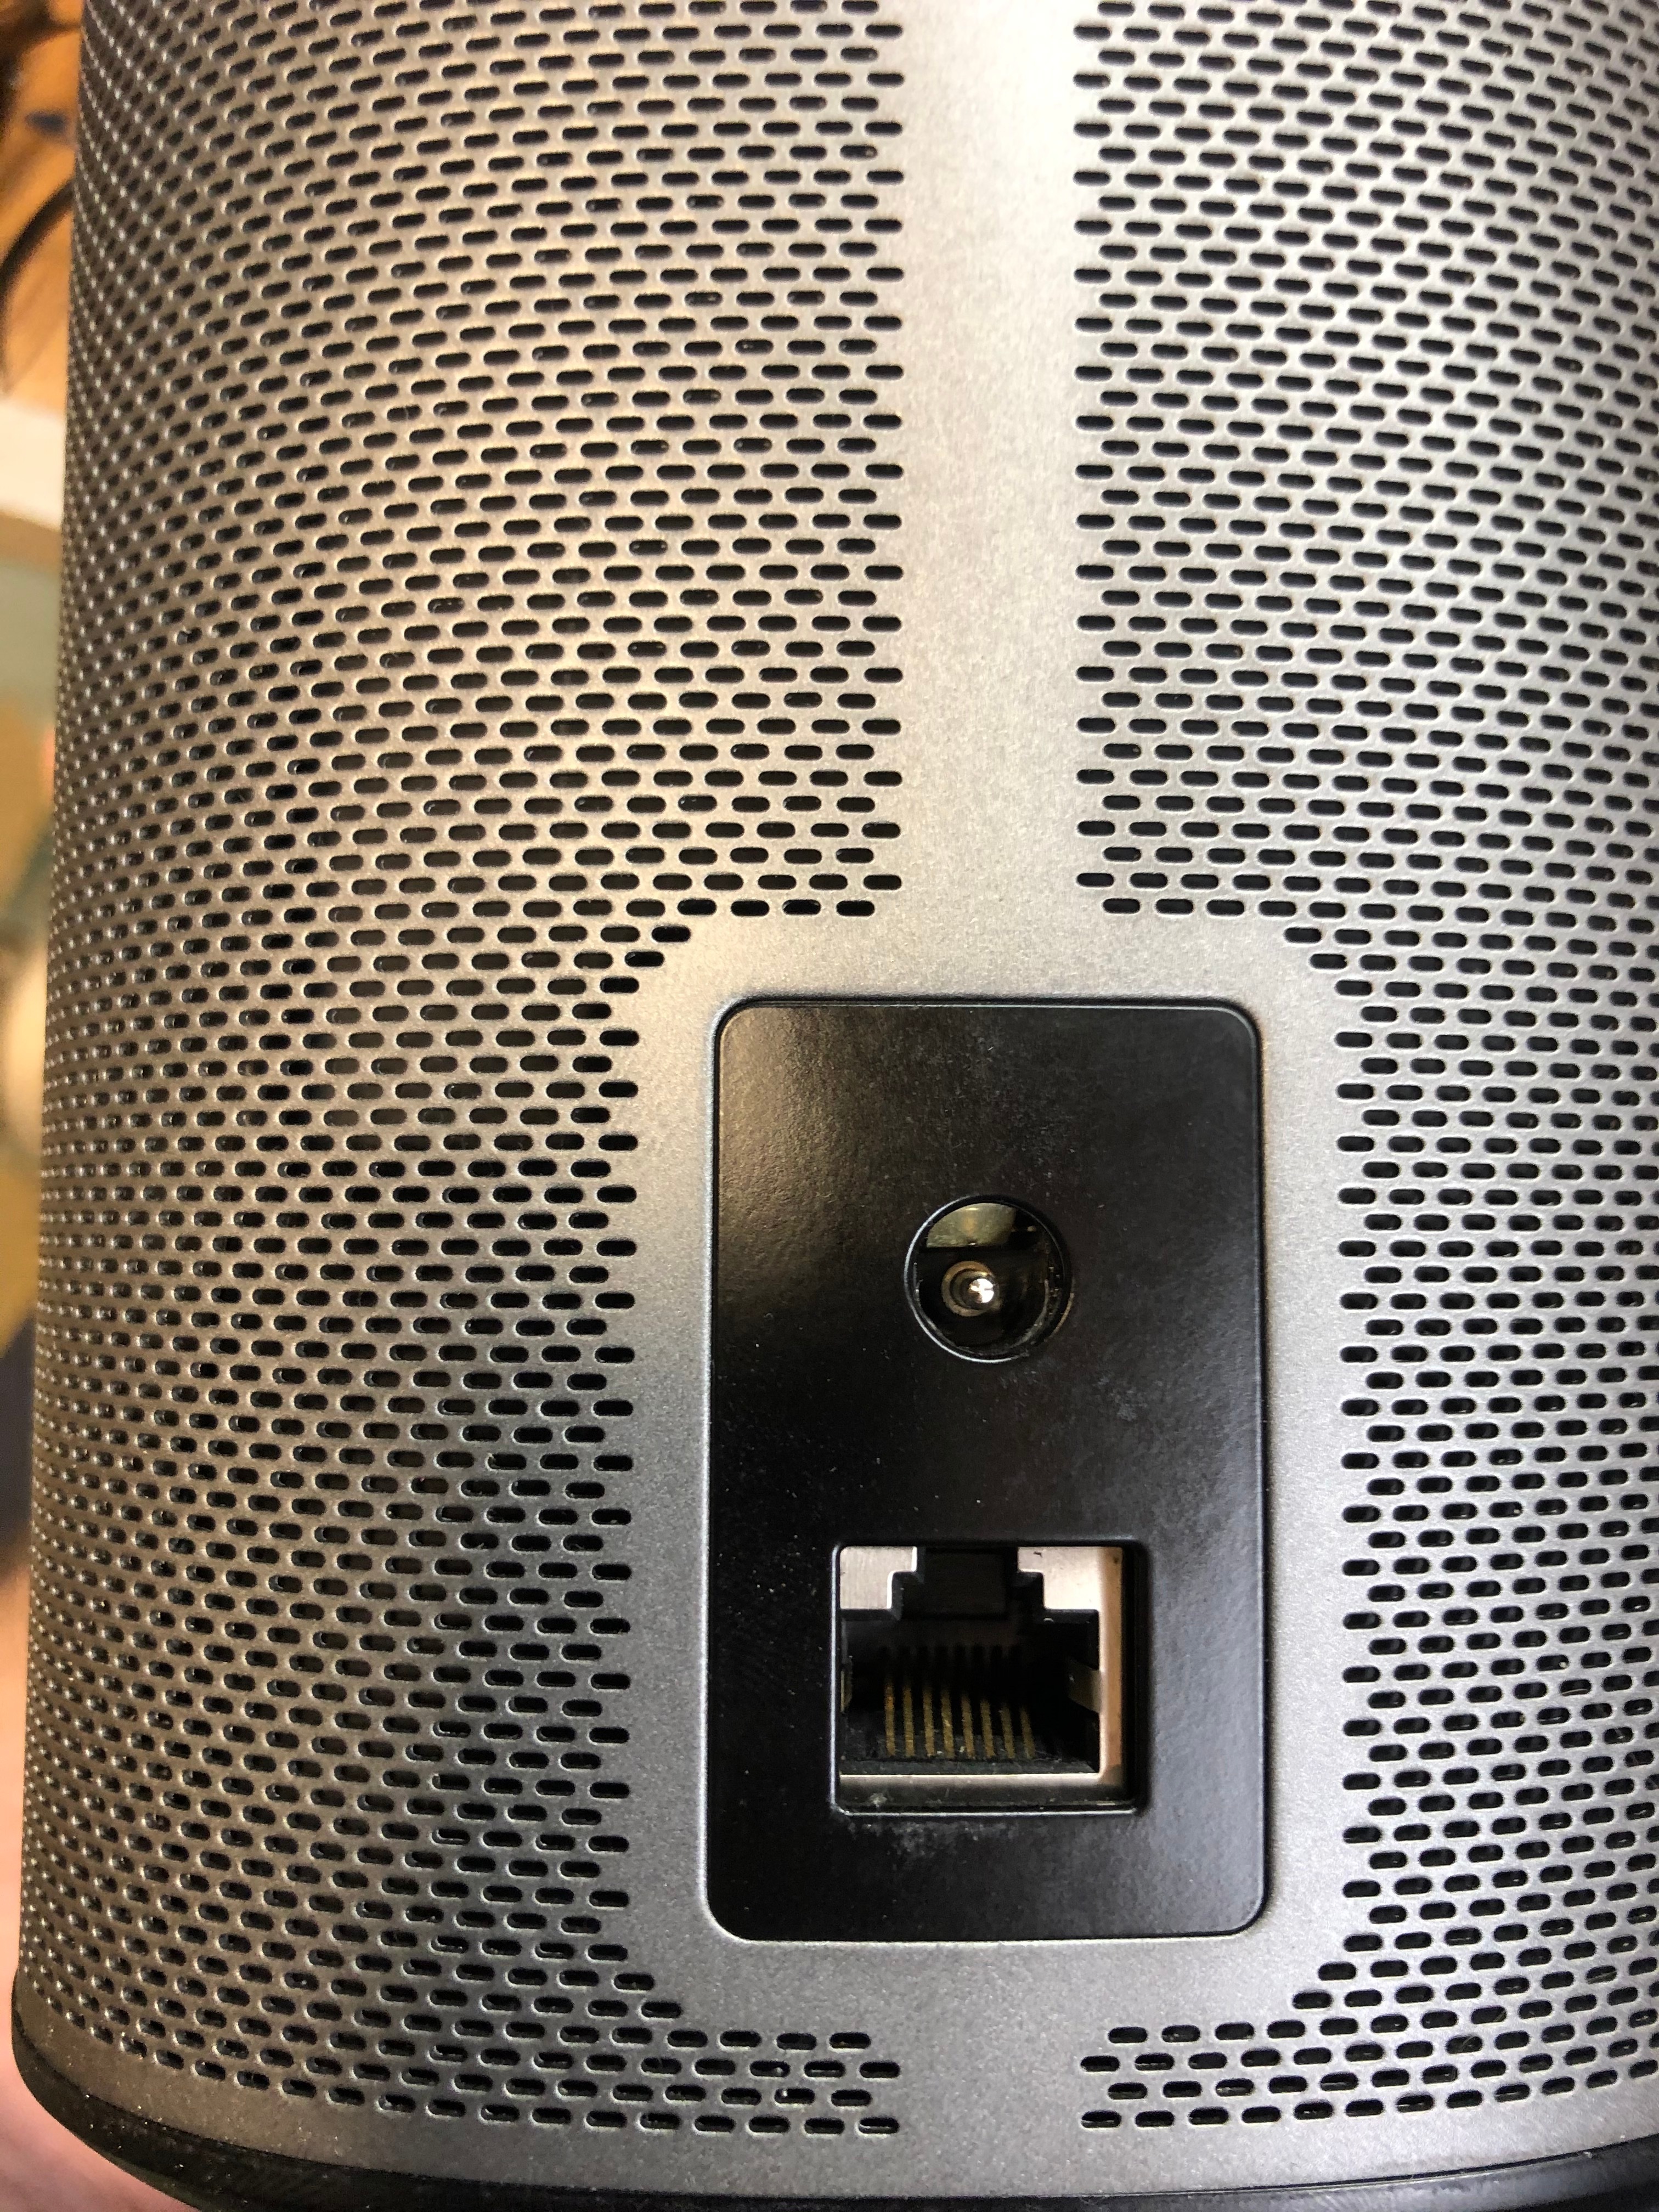
Applied power and all works well again.. for now until the next cheap component fails.
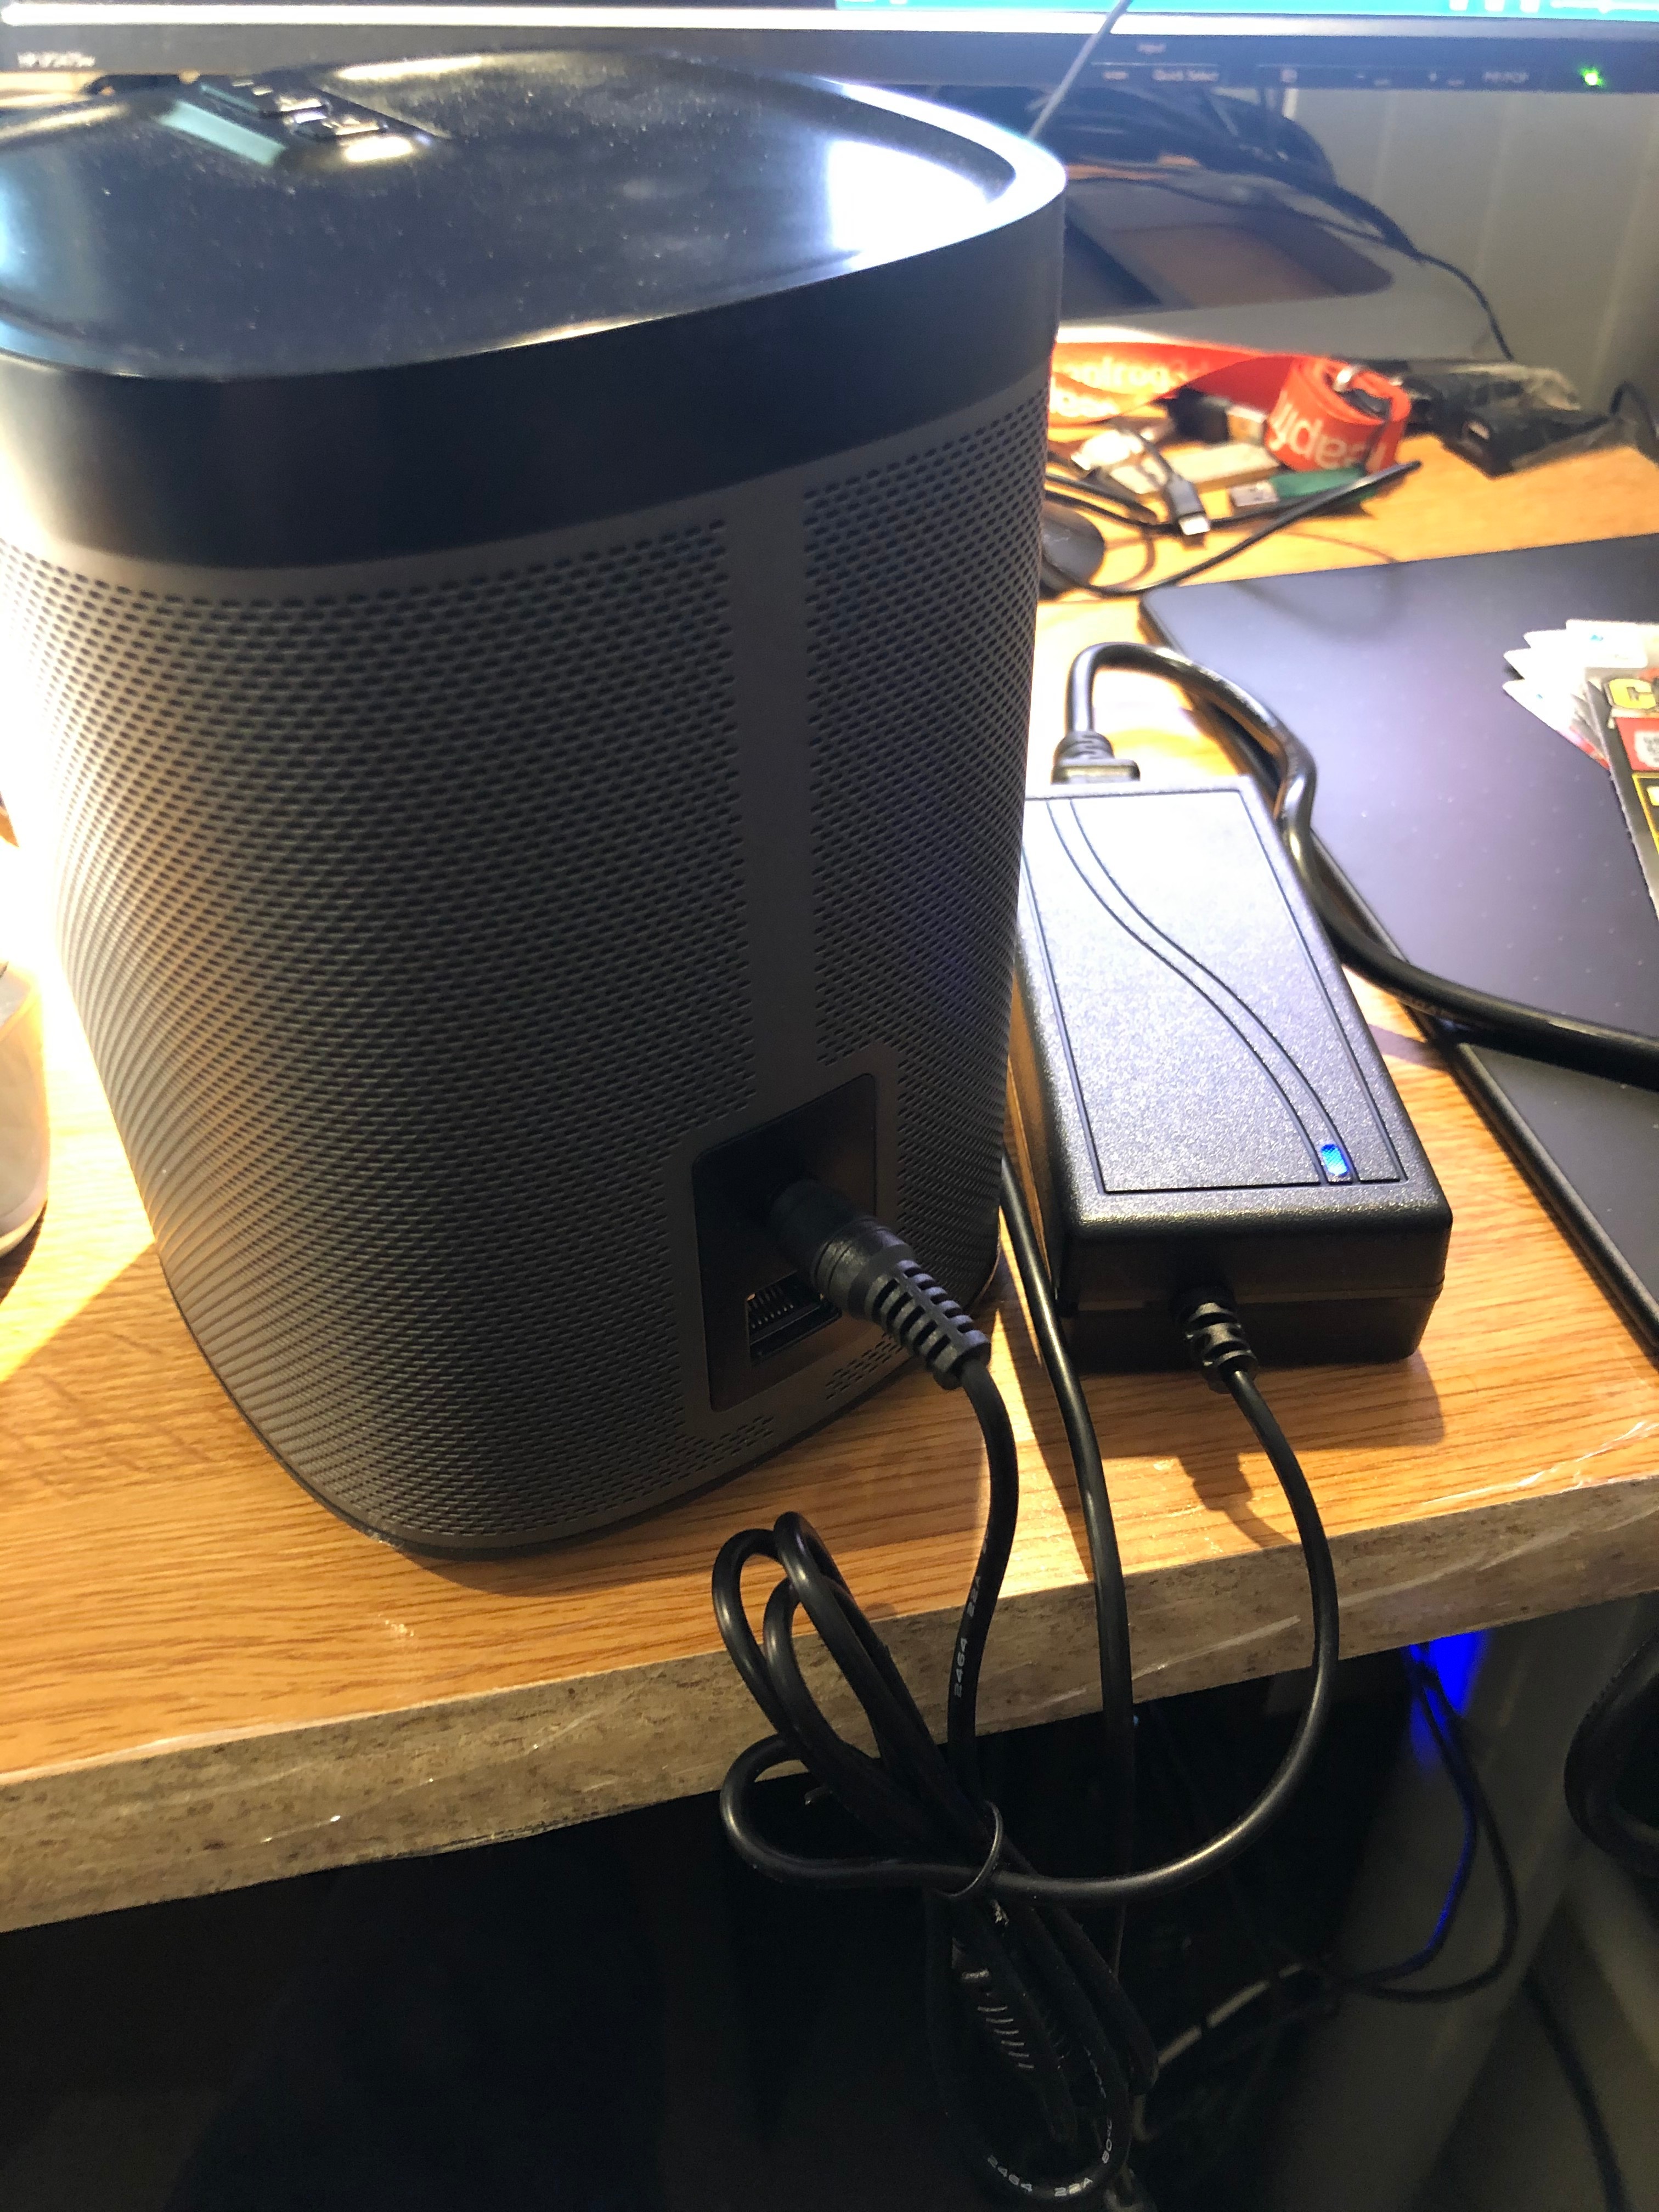
So I have a soort of power problem I think…… The know blinking white light problem. But in my case…. The led is very light flashing. it seems that the Play 1 does not get enough power and therefore does not start. A factory reset also fails. So thats why I tink its a power problem?
Is this possible? What do you think!
Enter your E-mail address. We'll send you an e-mail with instructions to reset your password.

